
This training provides essential information on using the BarnDealer Marketplace Export tool. We will guide you through the steps to efficiently post your shed inventory to Facebook Marketplace, ensuring a smooth and effective listing process. This session will walk you through the process of efficiently posting your shed inventory directly onto Facebook Marketplace. While this process is most easily completed on a computer, we will cover all the necessary steps to ensure a smooth experience.
1. Downloading the Marketplace Export CSV
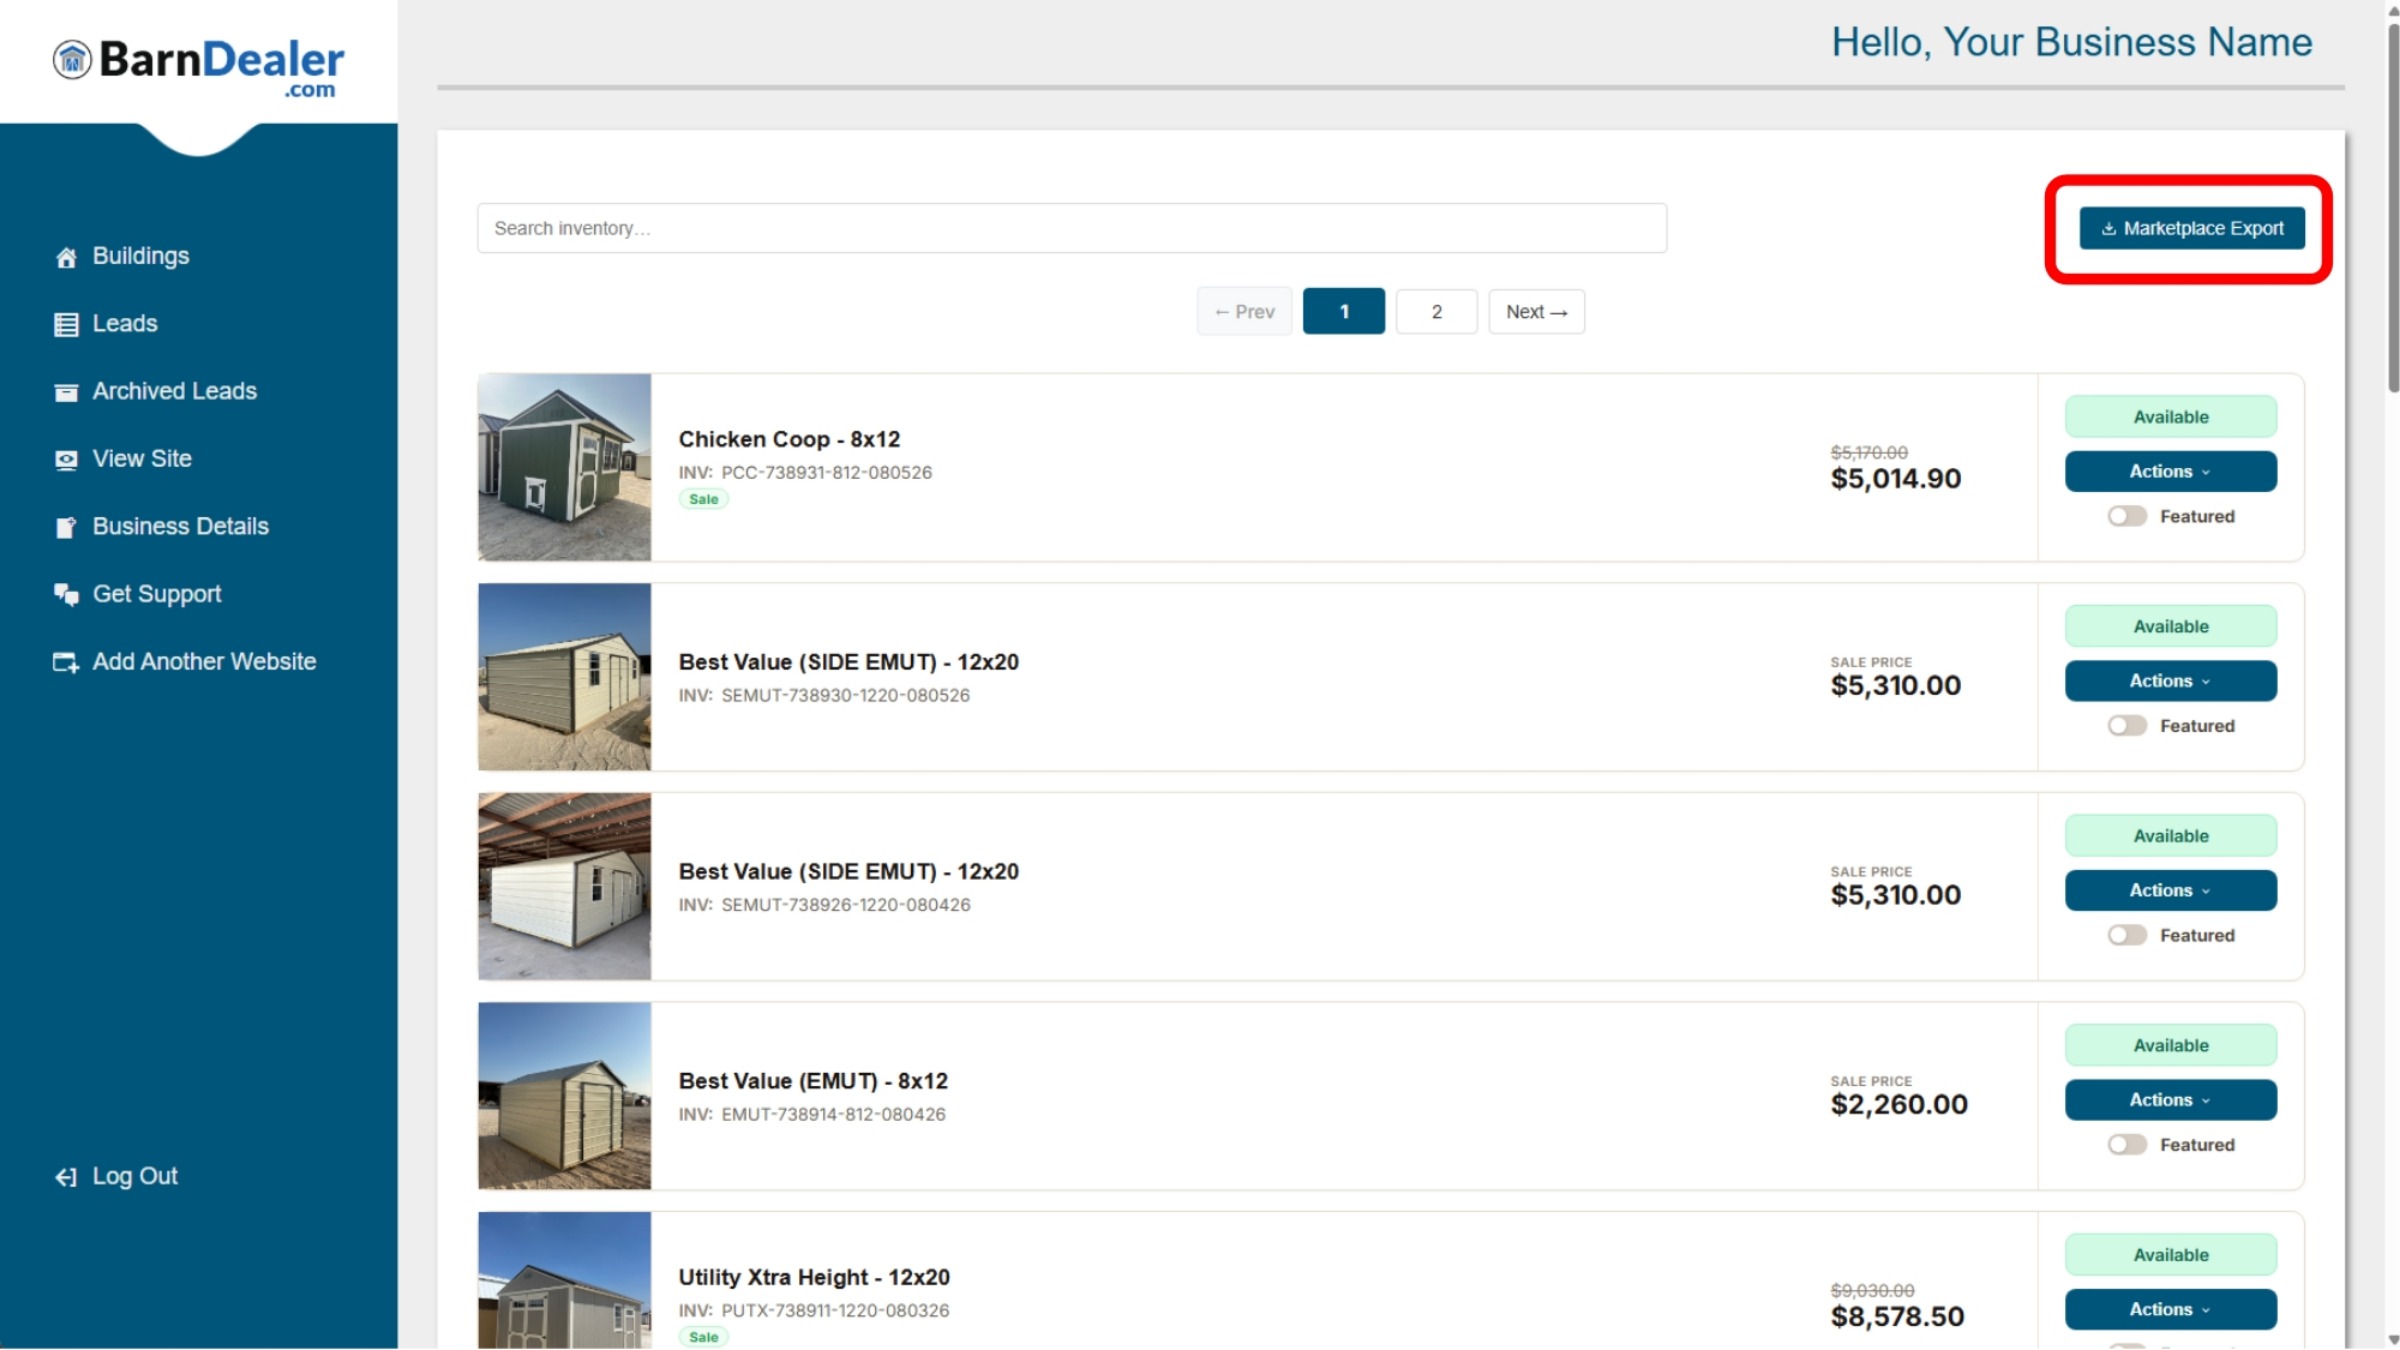
To begin, ensure you are logged into your BarnDealer site and are currently on the Buildings page. From there, locate and click the 'Marketplace Export' button, typically found in the top right corner of your screen. This action will automatically download a CSV file to your computer, which contains all your building inventory data. This file is crucial for the subsequent steps, so please note its saved location for later use.
2. Navigating to Facebook Marketplace
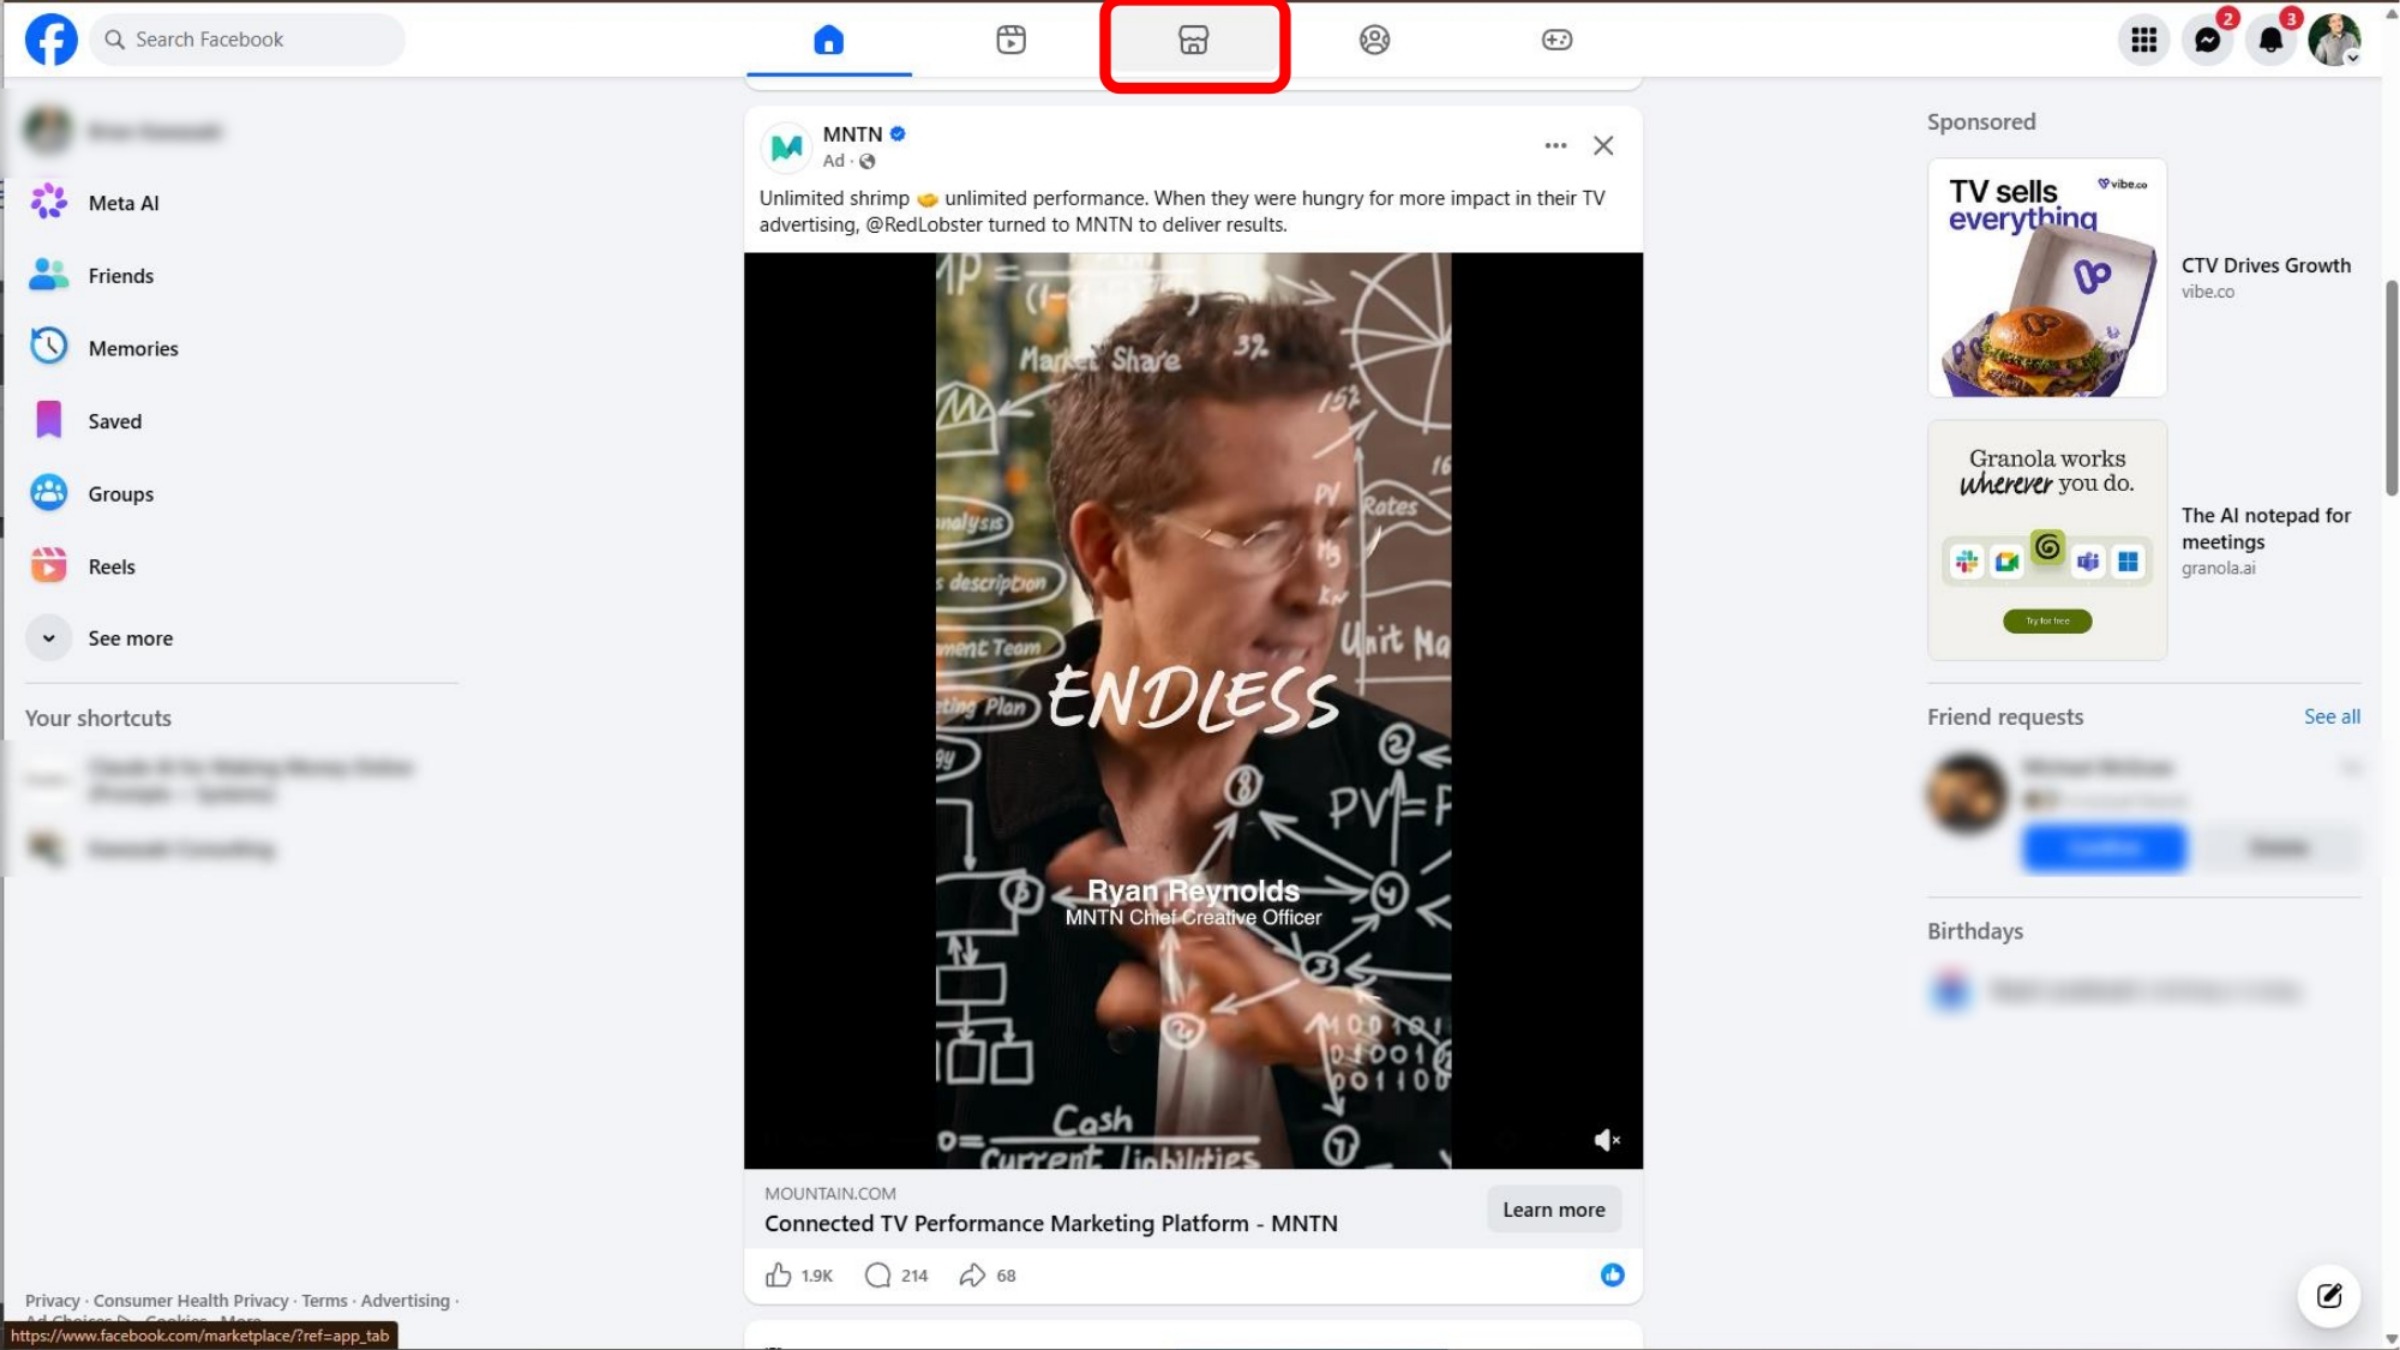
Once your CSV file has successfully downloaded, the next step is to open Facebook. We recommend doing this in a new browser tab or window to maintain your workflow. After Facebook loads, navigate directly to the Marketplace section. This is where you will begin the process of creating your multiple listings using the data you just exported from BarnDealer.
3. Creating Multiple Listings
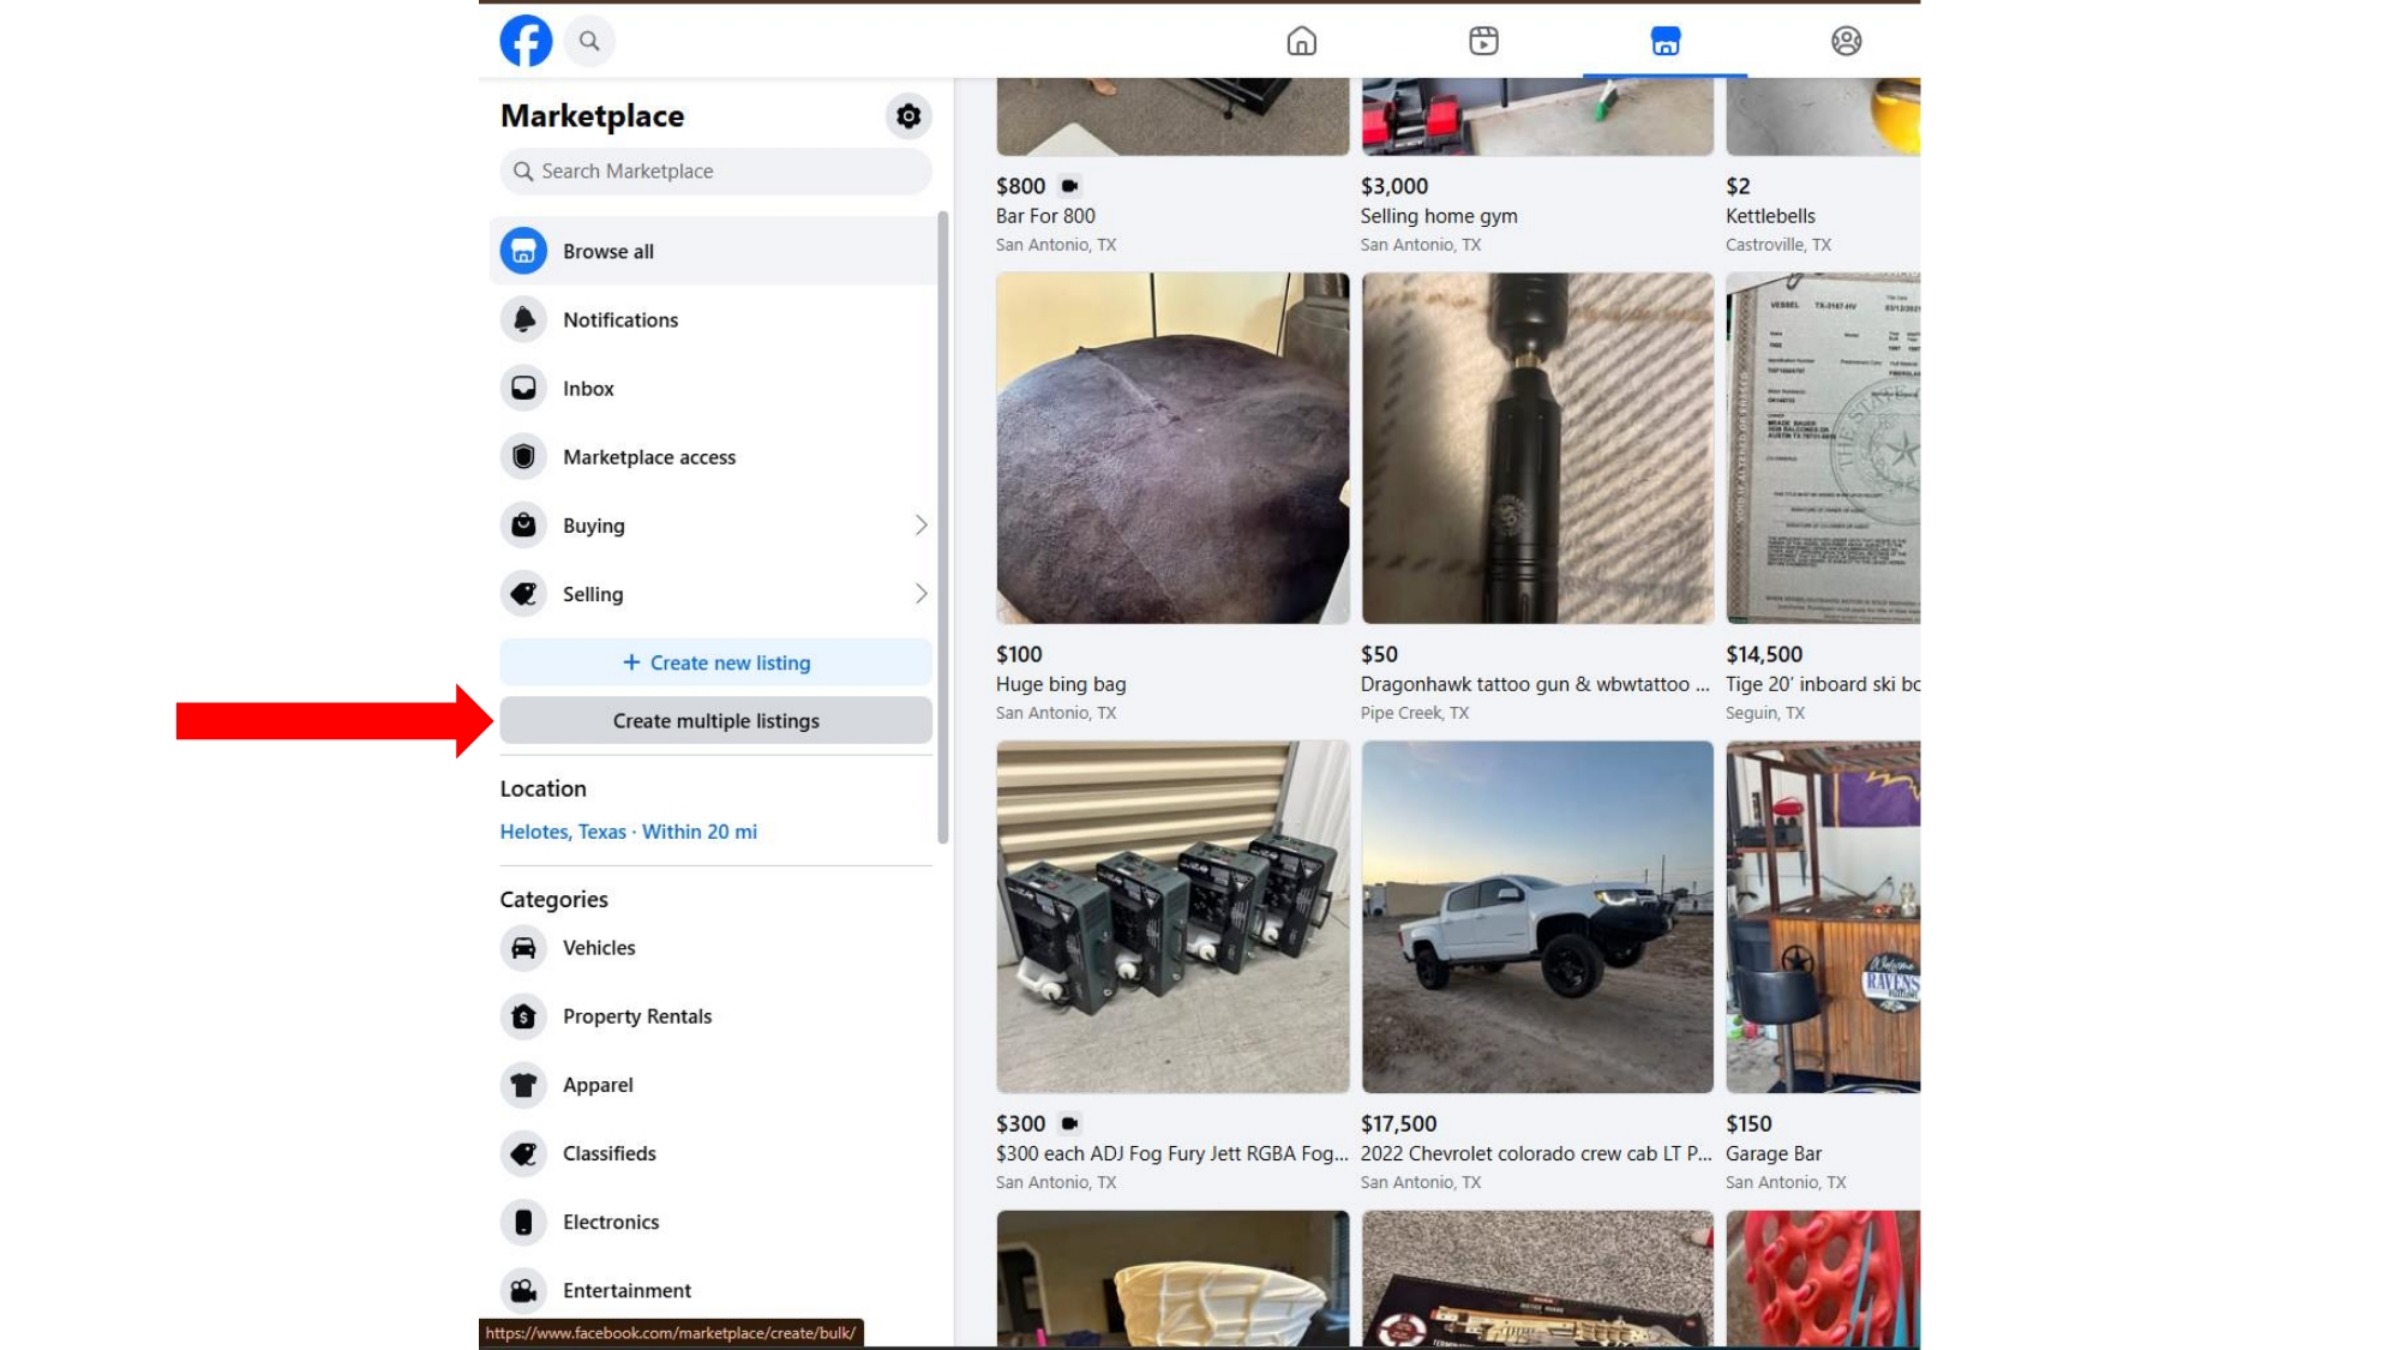
Upon entering Facebook Marketplace, look for and click the 'Create Multiple Listings' button. It's important to note that if this option is not visible, your Facebook page might be restricted or too new to utilize this feature. In such cases, you may need to contact Facebook support for assistance, as BarnDealer support cannot resolve Facebook's internal restrictions. If the option remains unavailable, you will likely need to add each listing manually, as this bulk export method will not be applicable for your account.
4. Uploading Your Spreadsheet
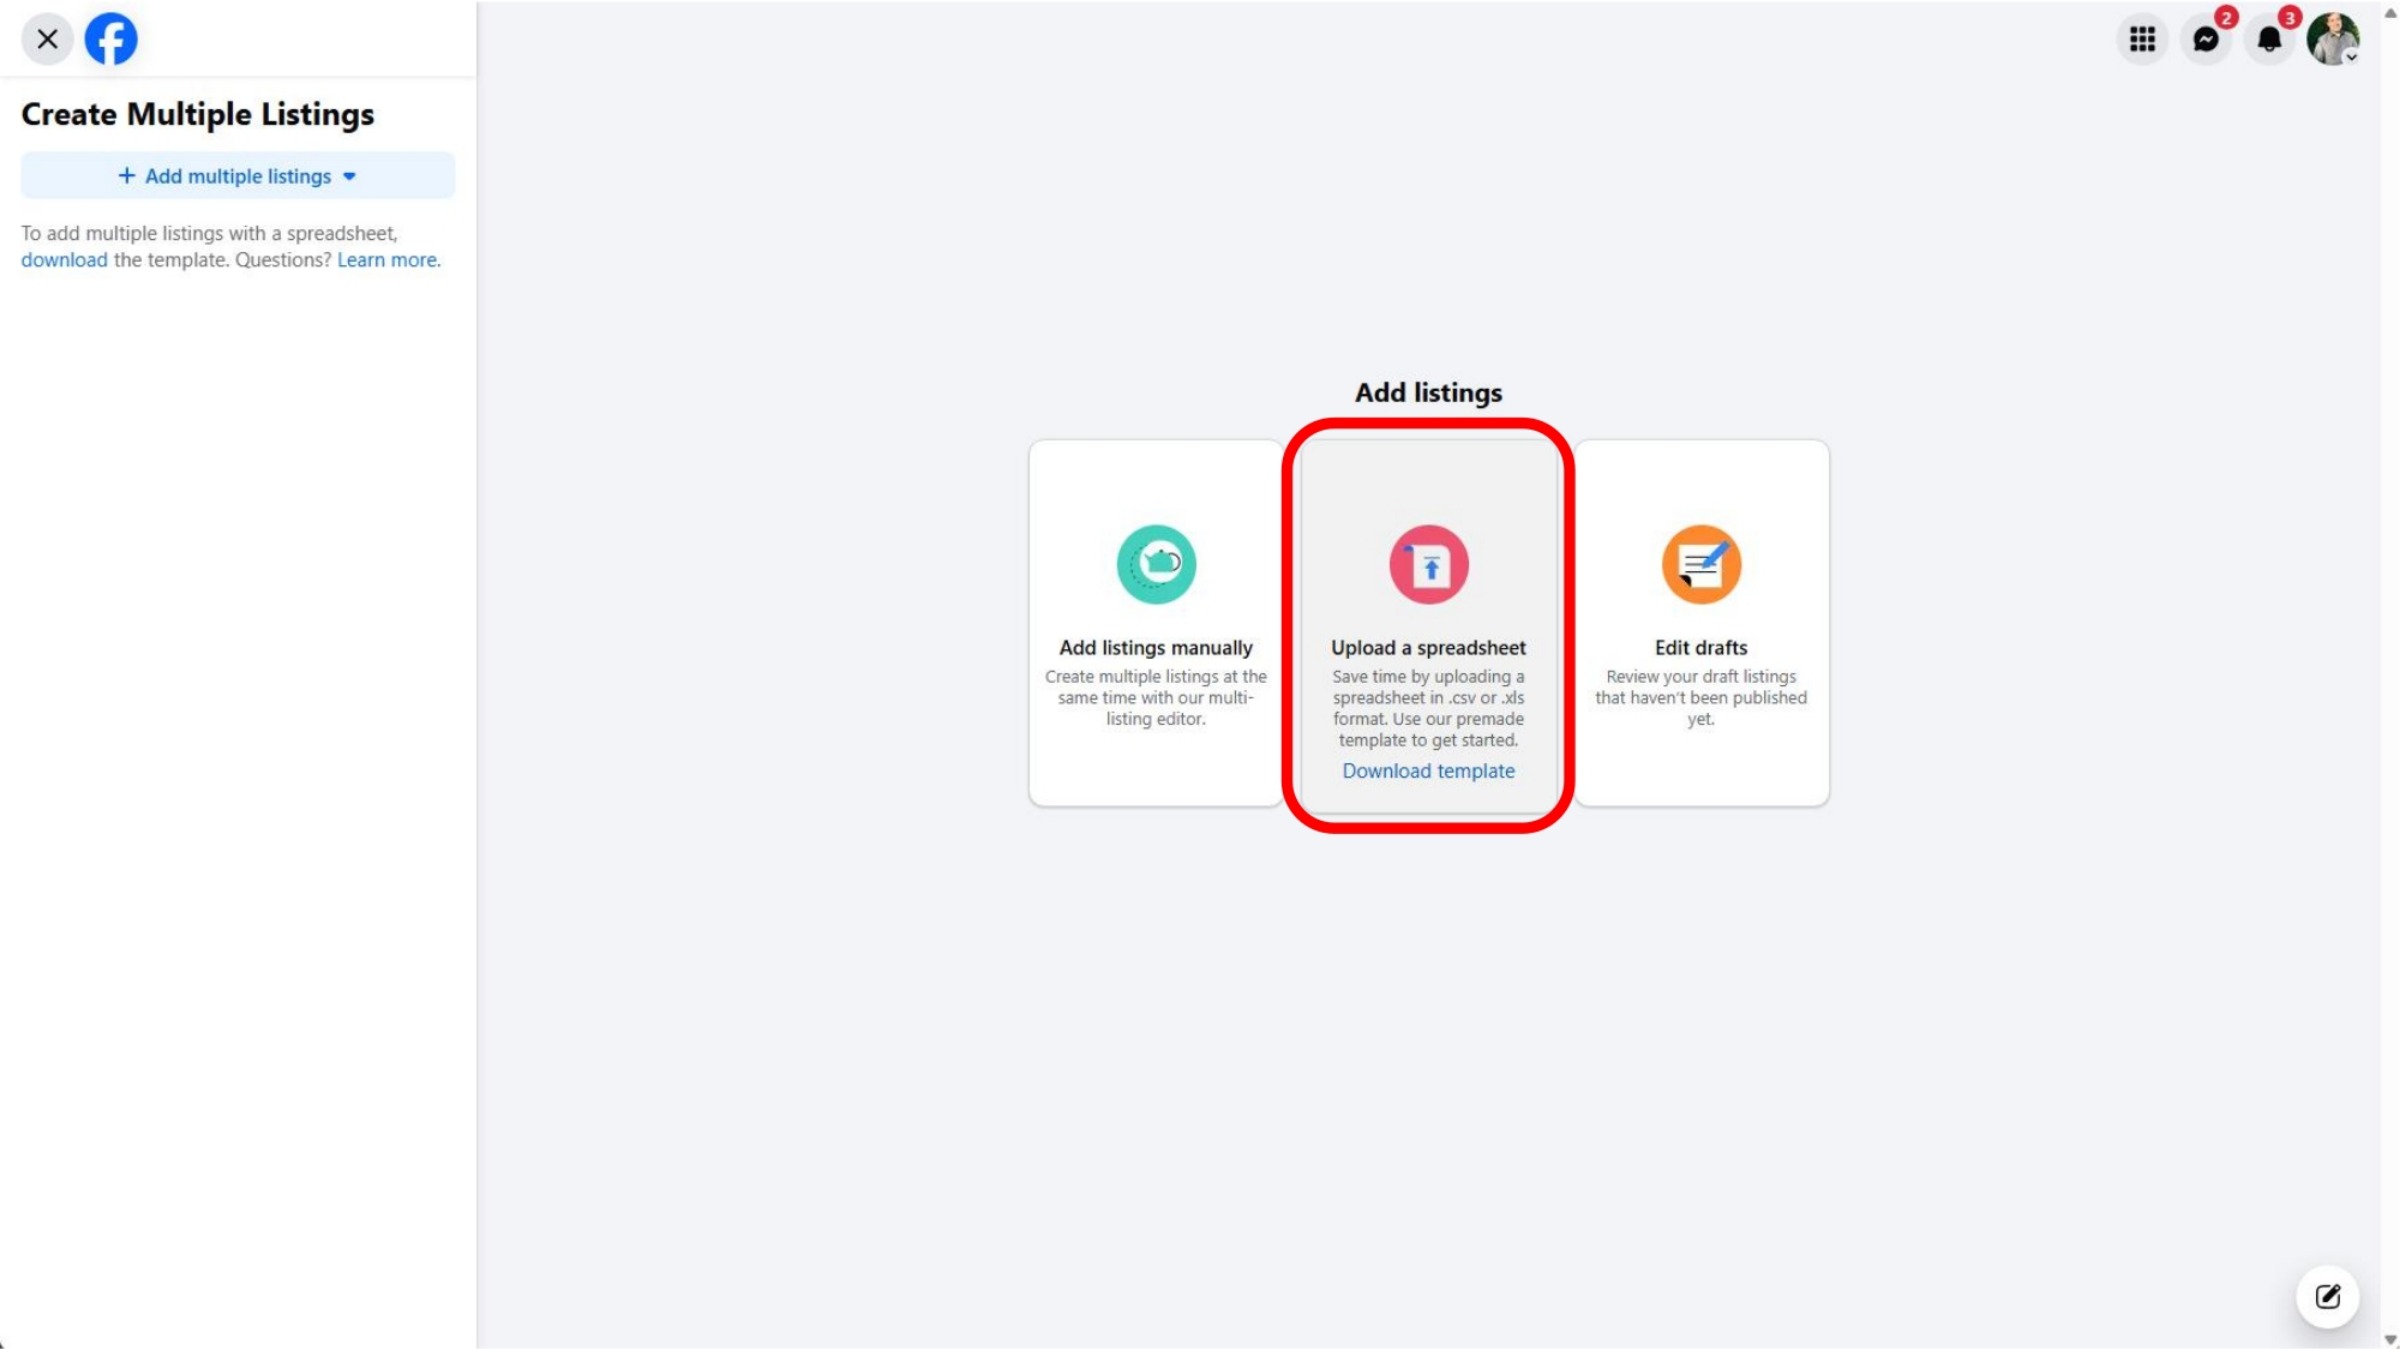
After selecting 'Create Multiple Listings,' you will be presented with a screen offering different listing creation methods. To proceed with our streamlined process, choose the 'Upload a spreadsheet' option. This selection prepares Facebook to receive the inventory data you exported from BarnDealer, allowing you to quickly populate multiple listings without manual entry.
5. Selecting the CSV File
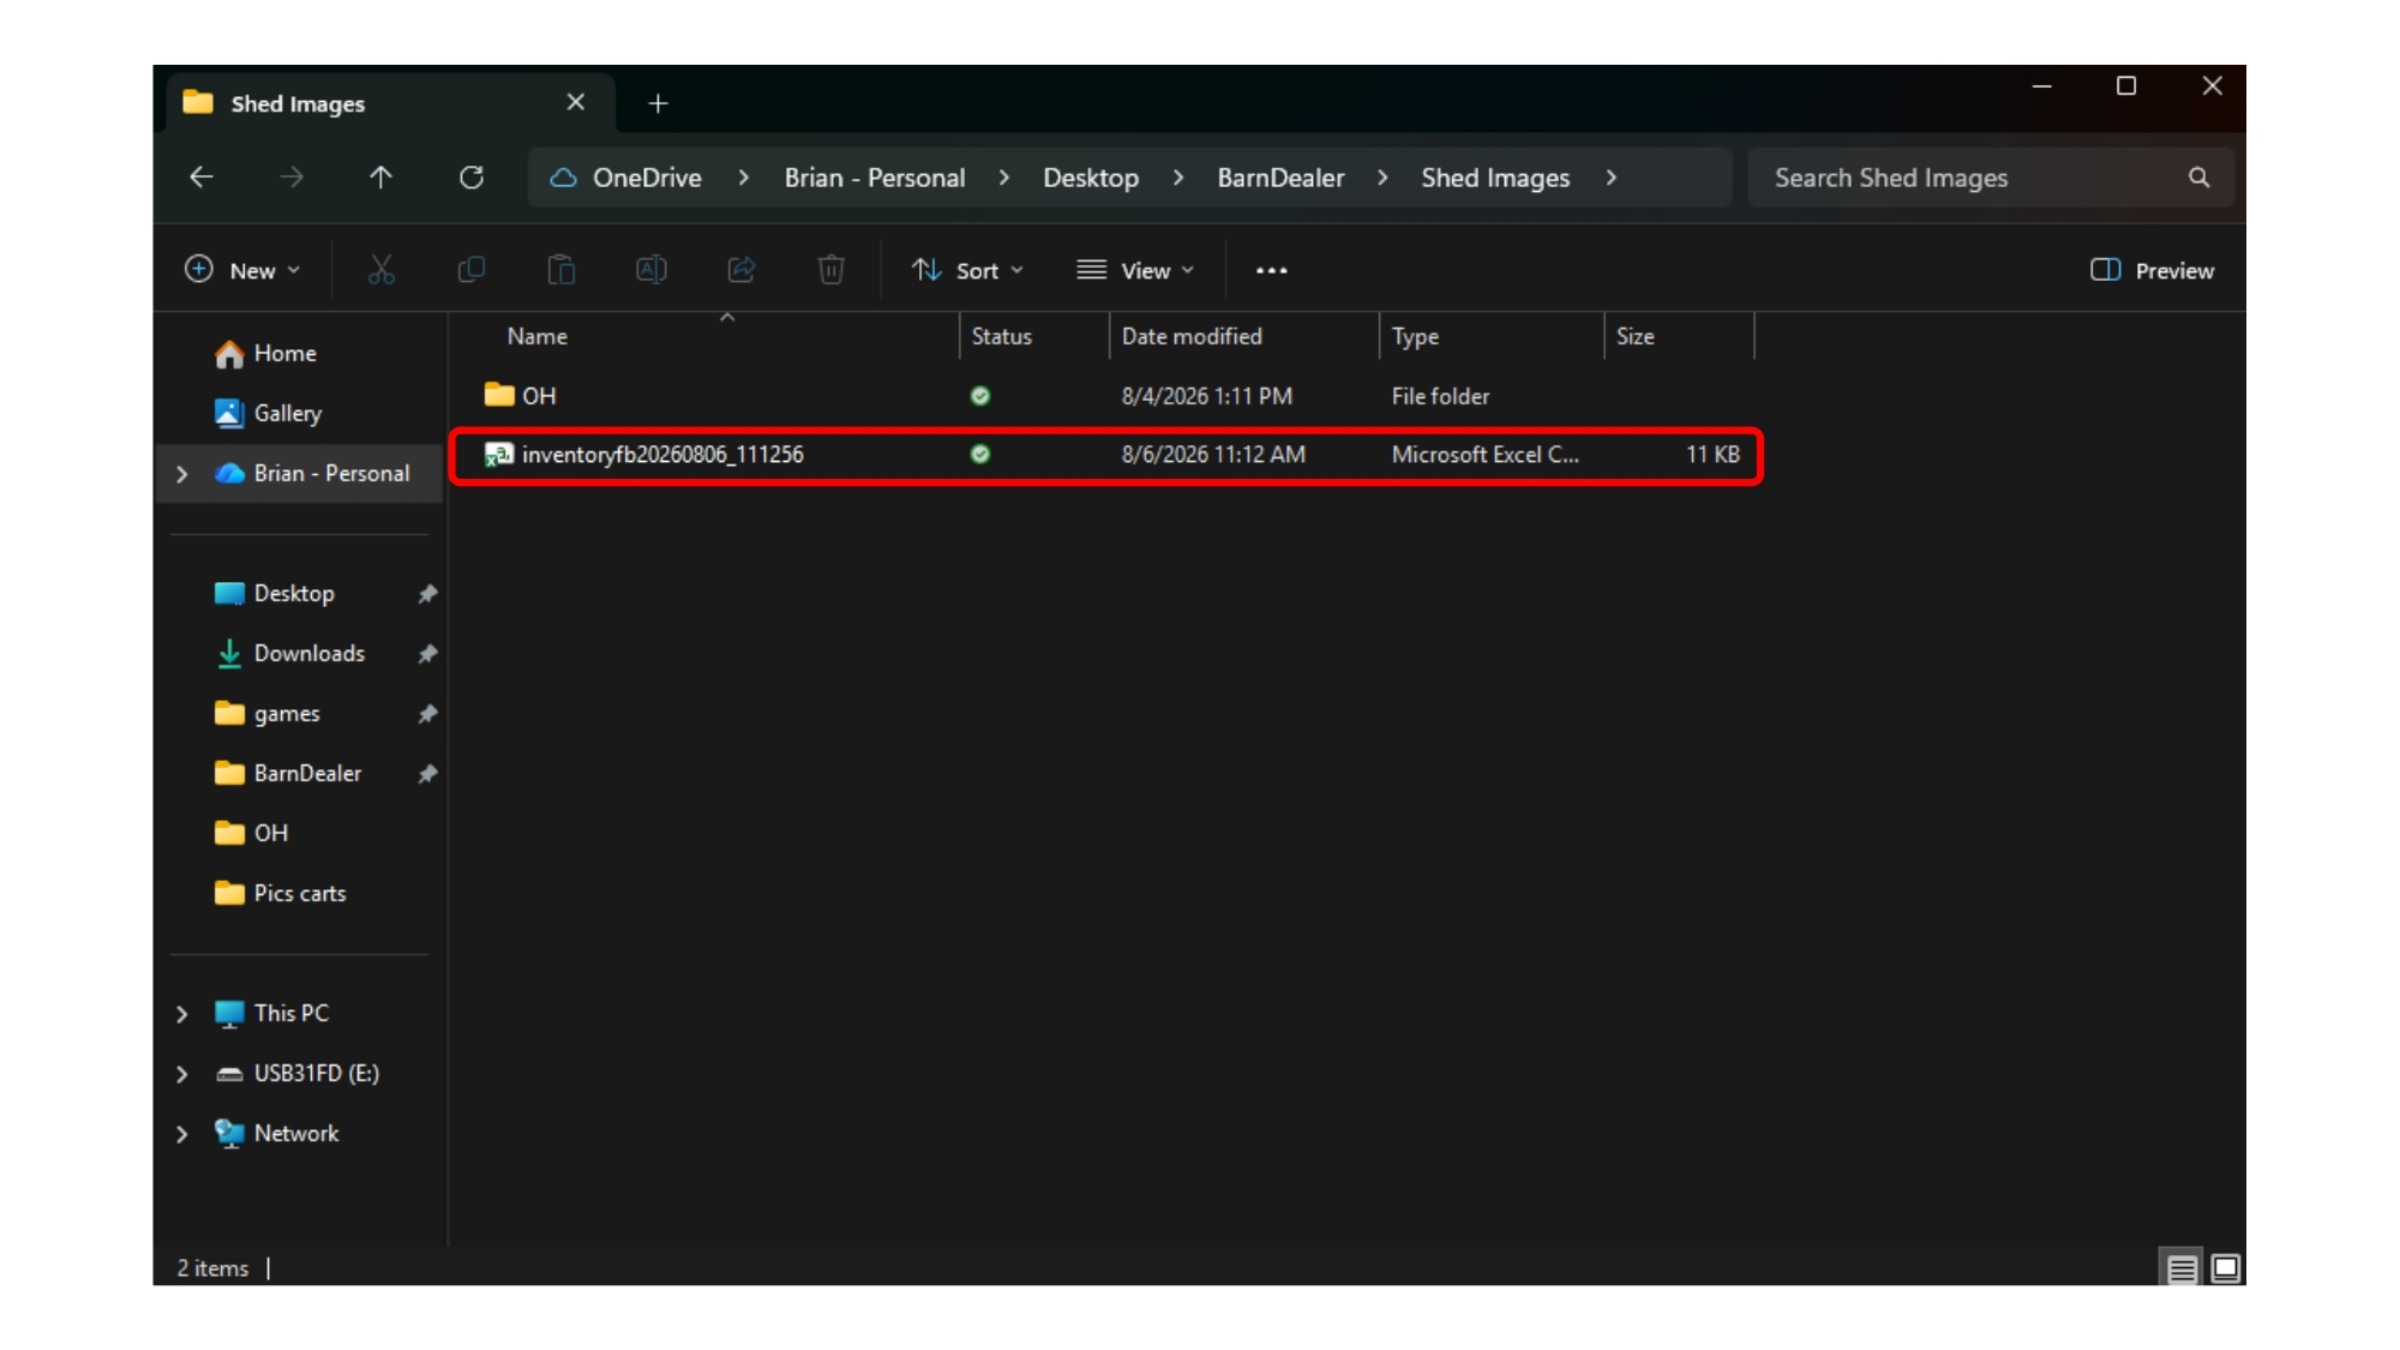
A dialog box will now appear, prompting you to choose the CSV file you downloaded earlier from your BarnDealer site. Navigate to where you saved this file on your computer, select it, and then click 'Open' or simply double-click the file. This action initiates the upload process, allowing Facebook to begin processing your inventory data for listing creation.
6. Extracting Image URLs from CSVReviewing Imported Listings and Adding Photos
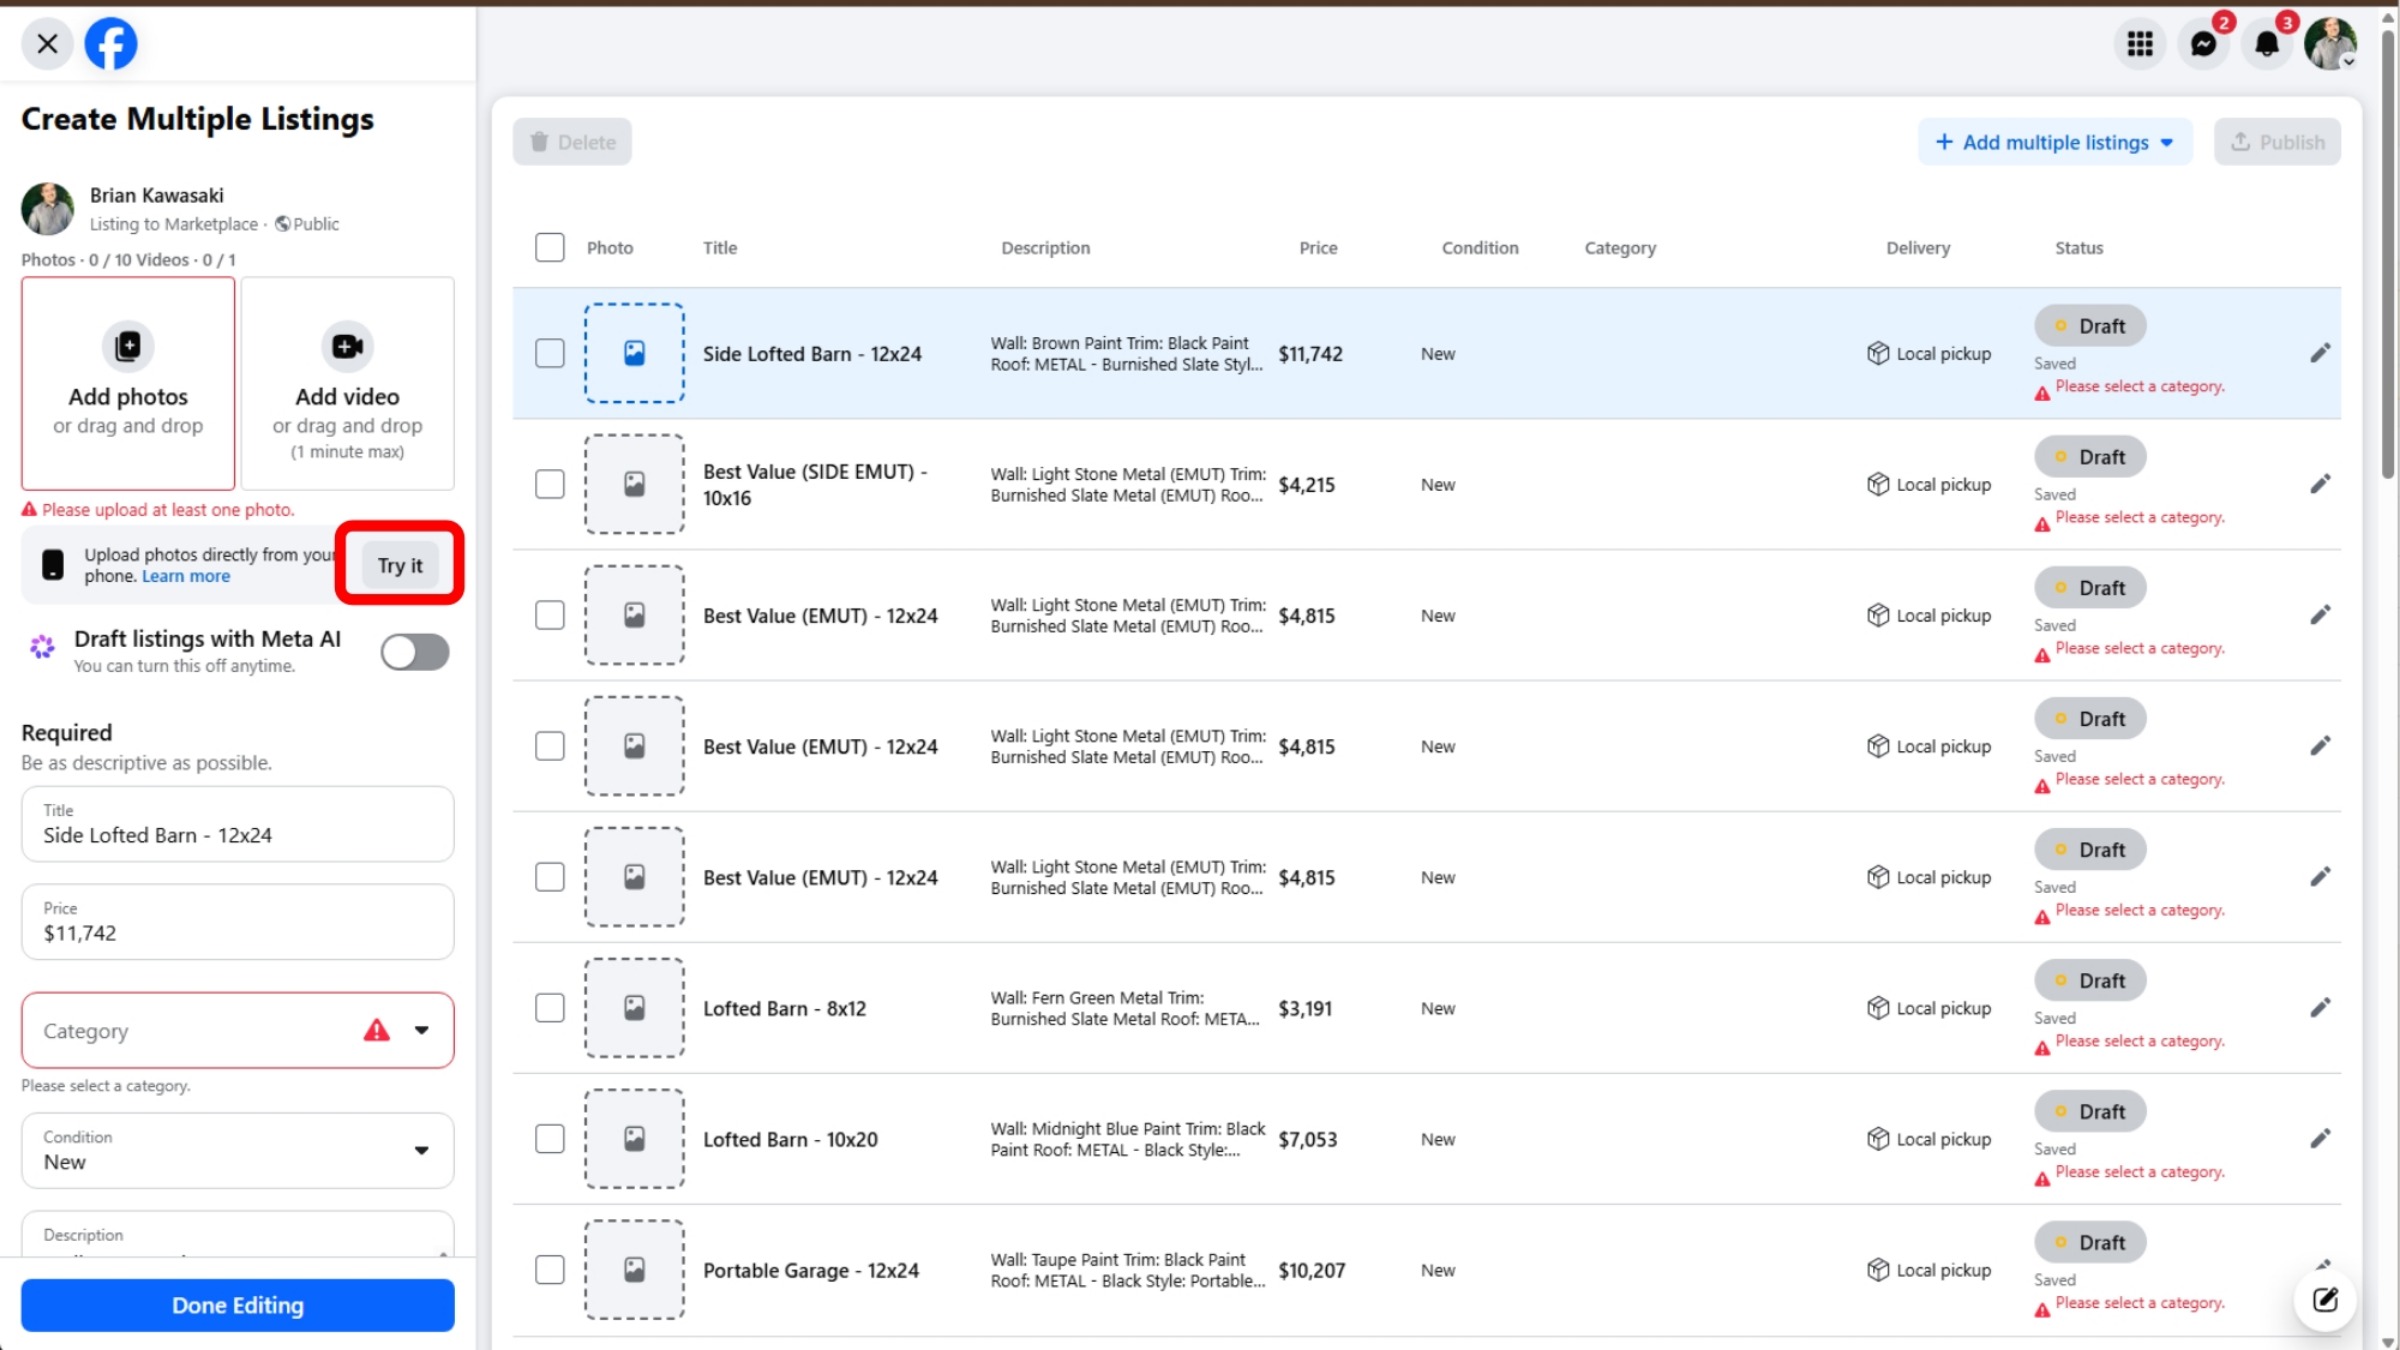
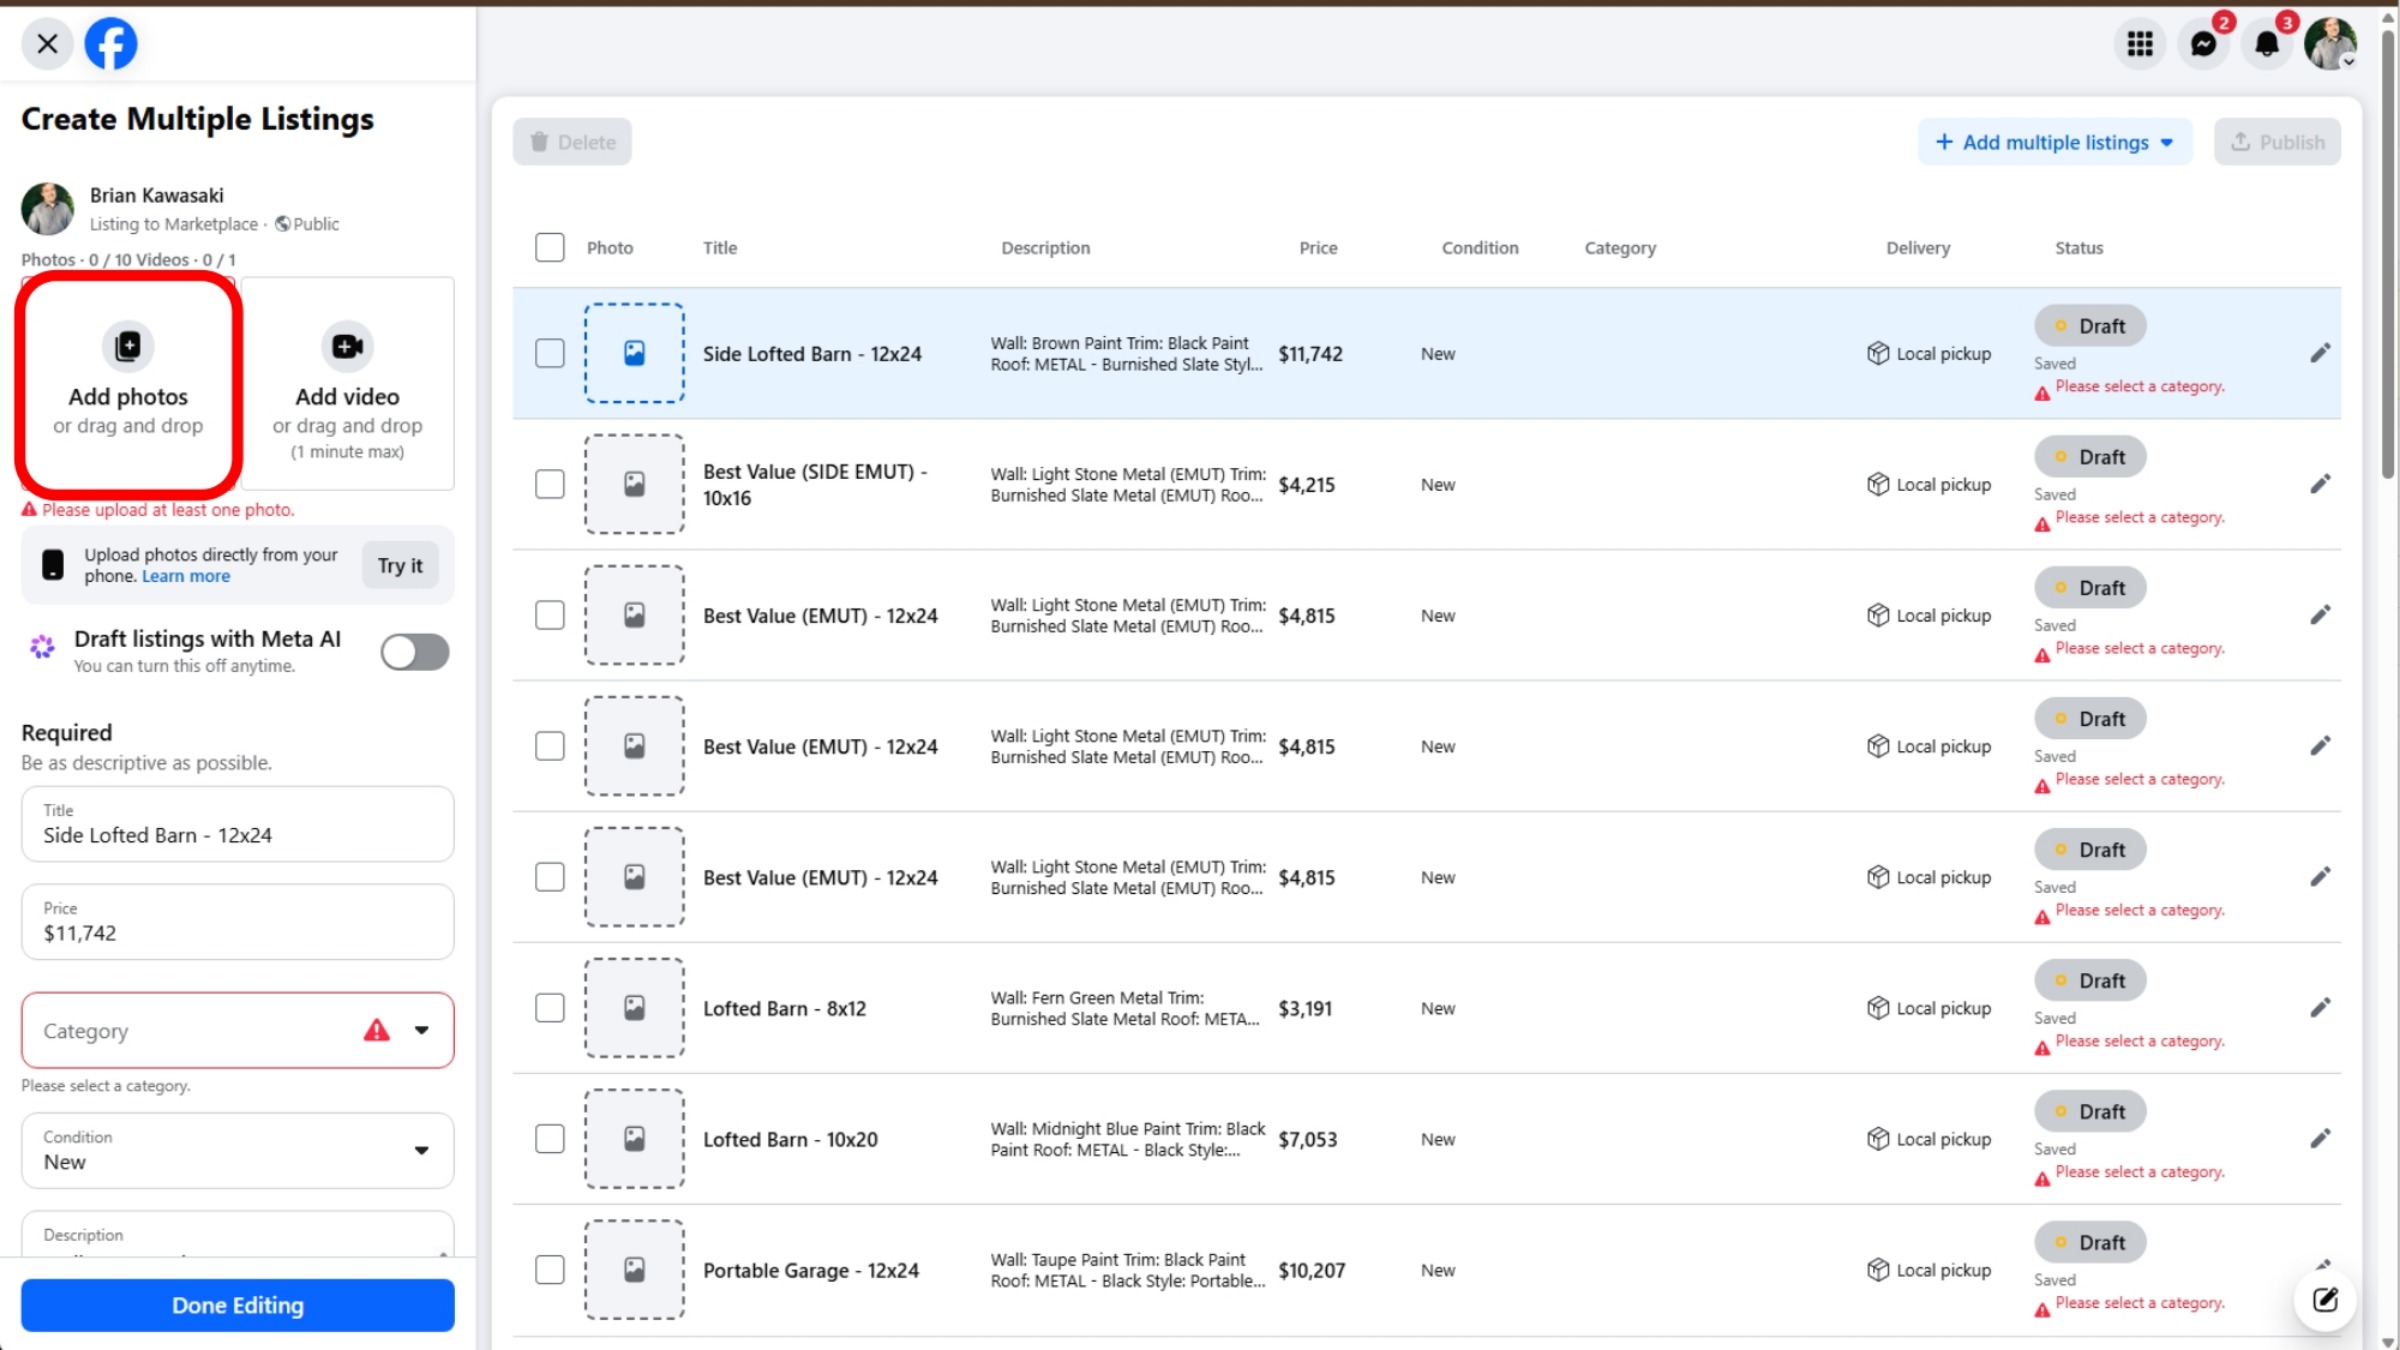
Once Facebook has processed your document, you will see all your buildings listed with their correct pricing, descriptions, and titles. There are a few more essential steps for each listing, starting with adding photos. One convenient method is to 'Upload Photos' directly from your phone by clicking 'Try it,' which opens your phone's camera to capture images from your lot. This is highly recommended if you are performing this process on a mobile device. For those using a computer, the alternative method involves opening the original CSV file again to access image URLs, which we will cover next.
7. Extracting Image URLs from CSV
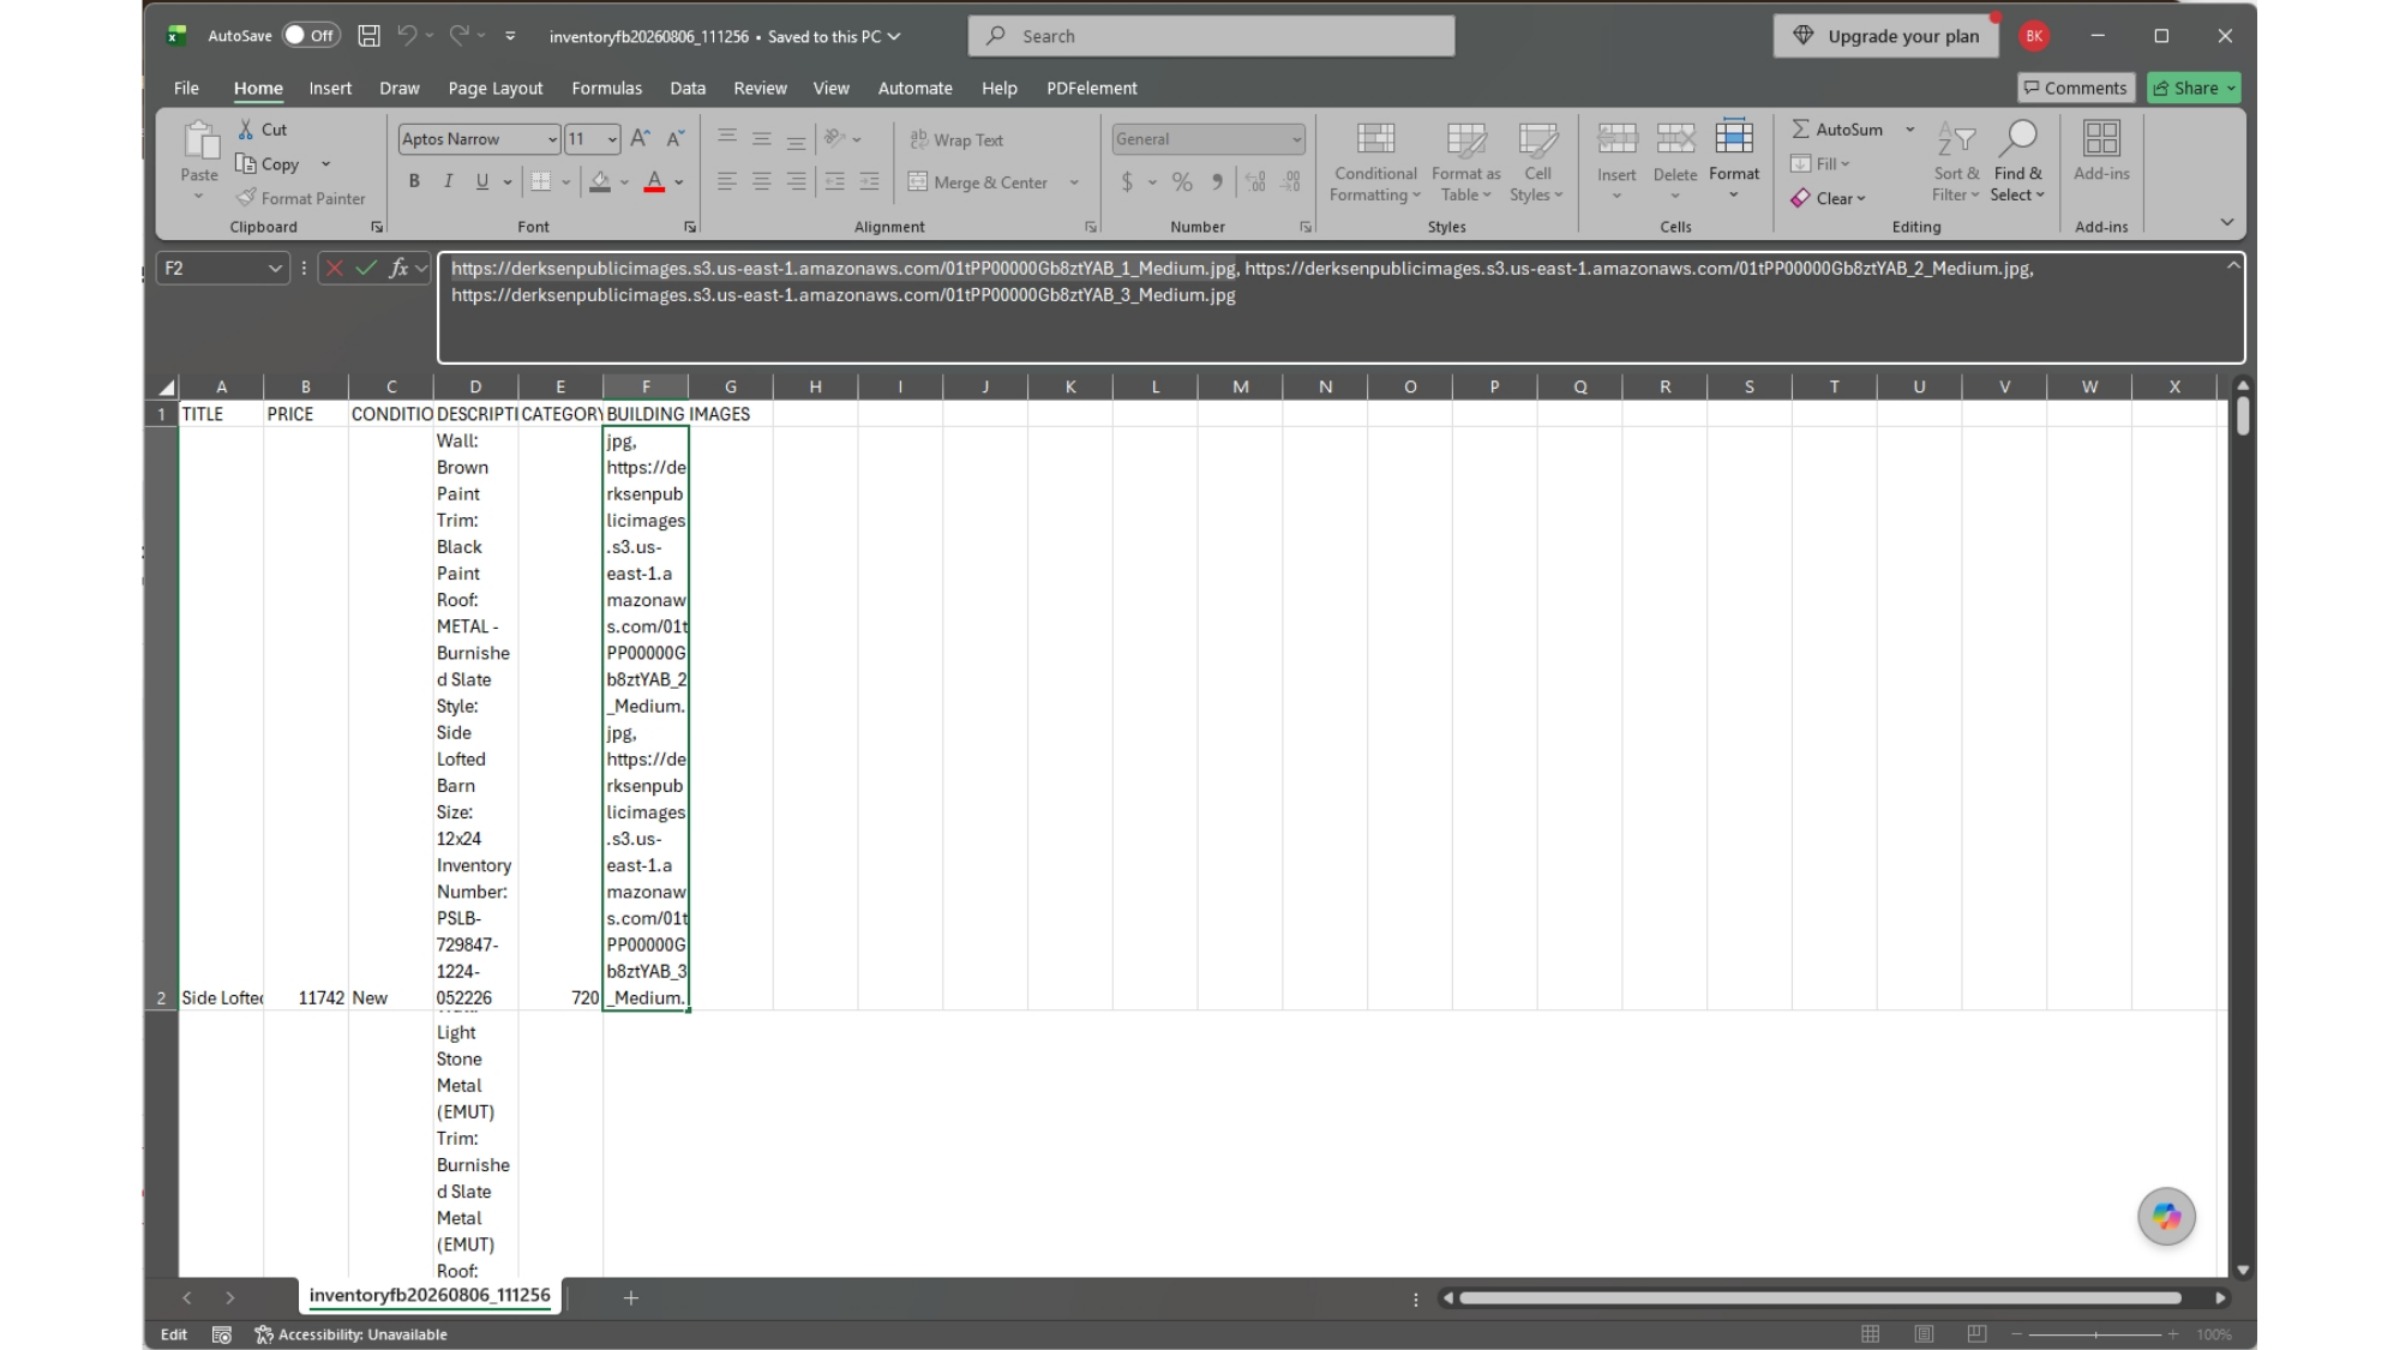
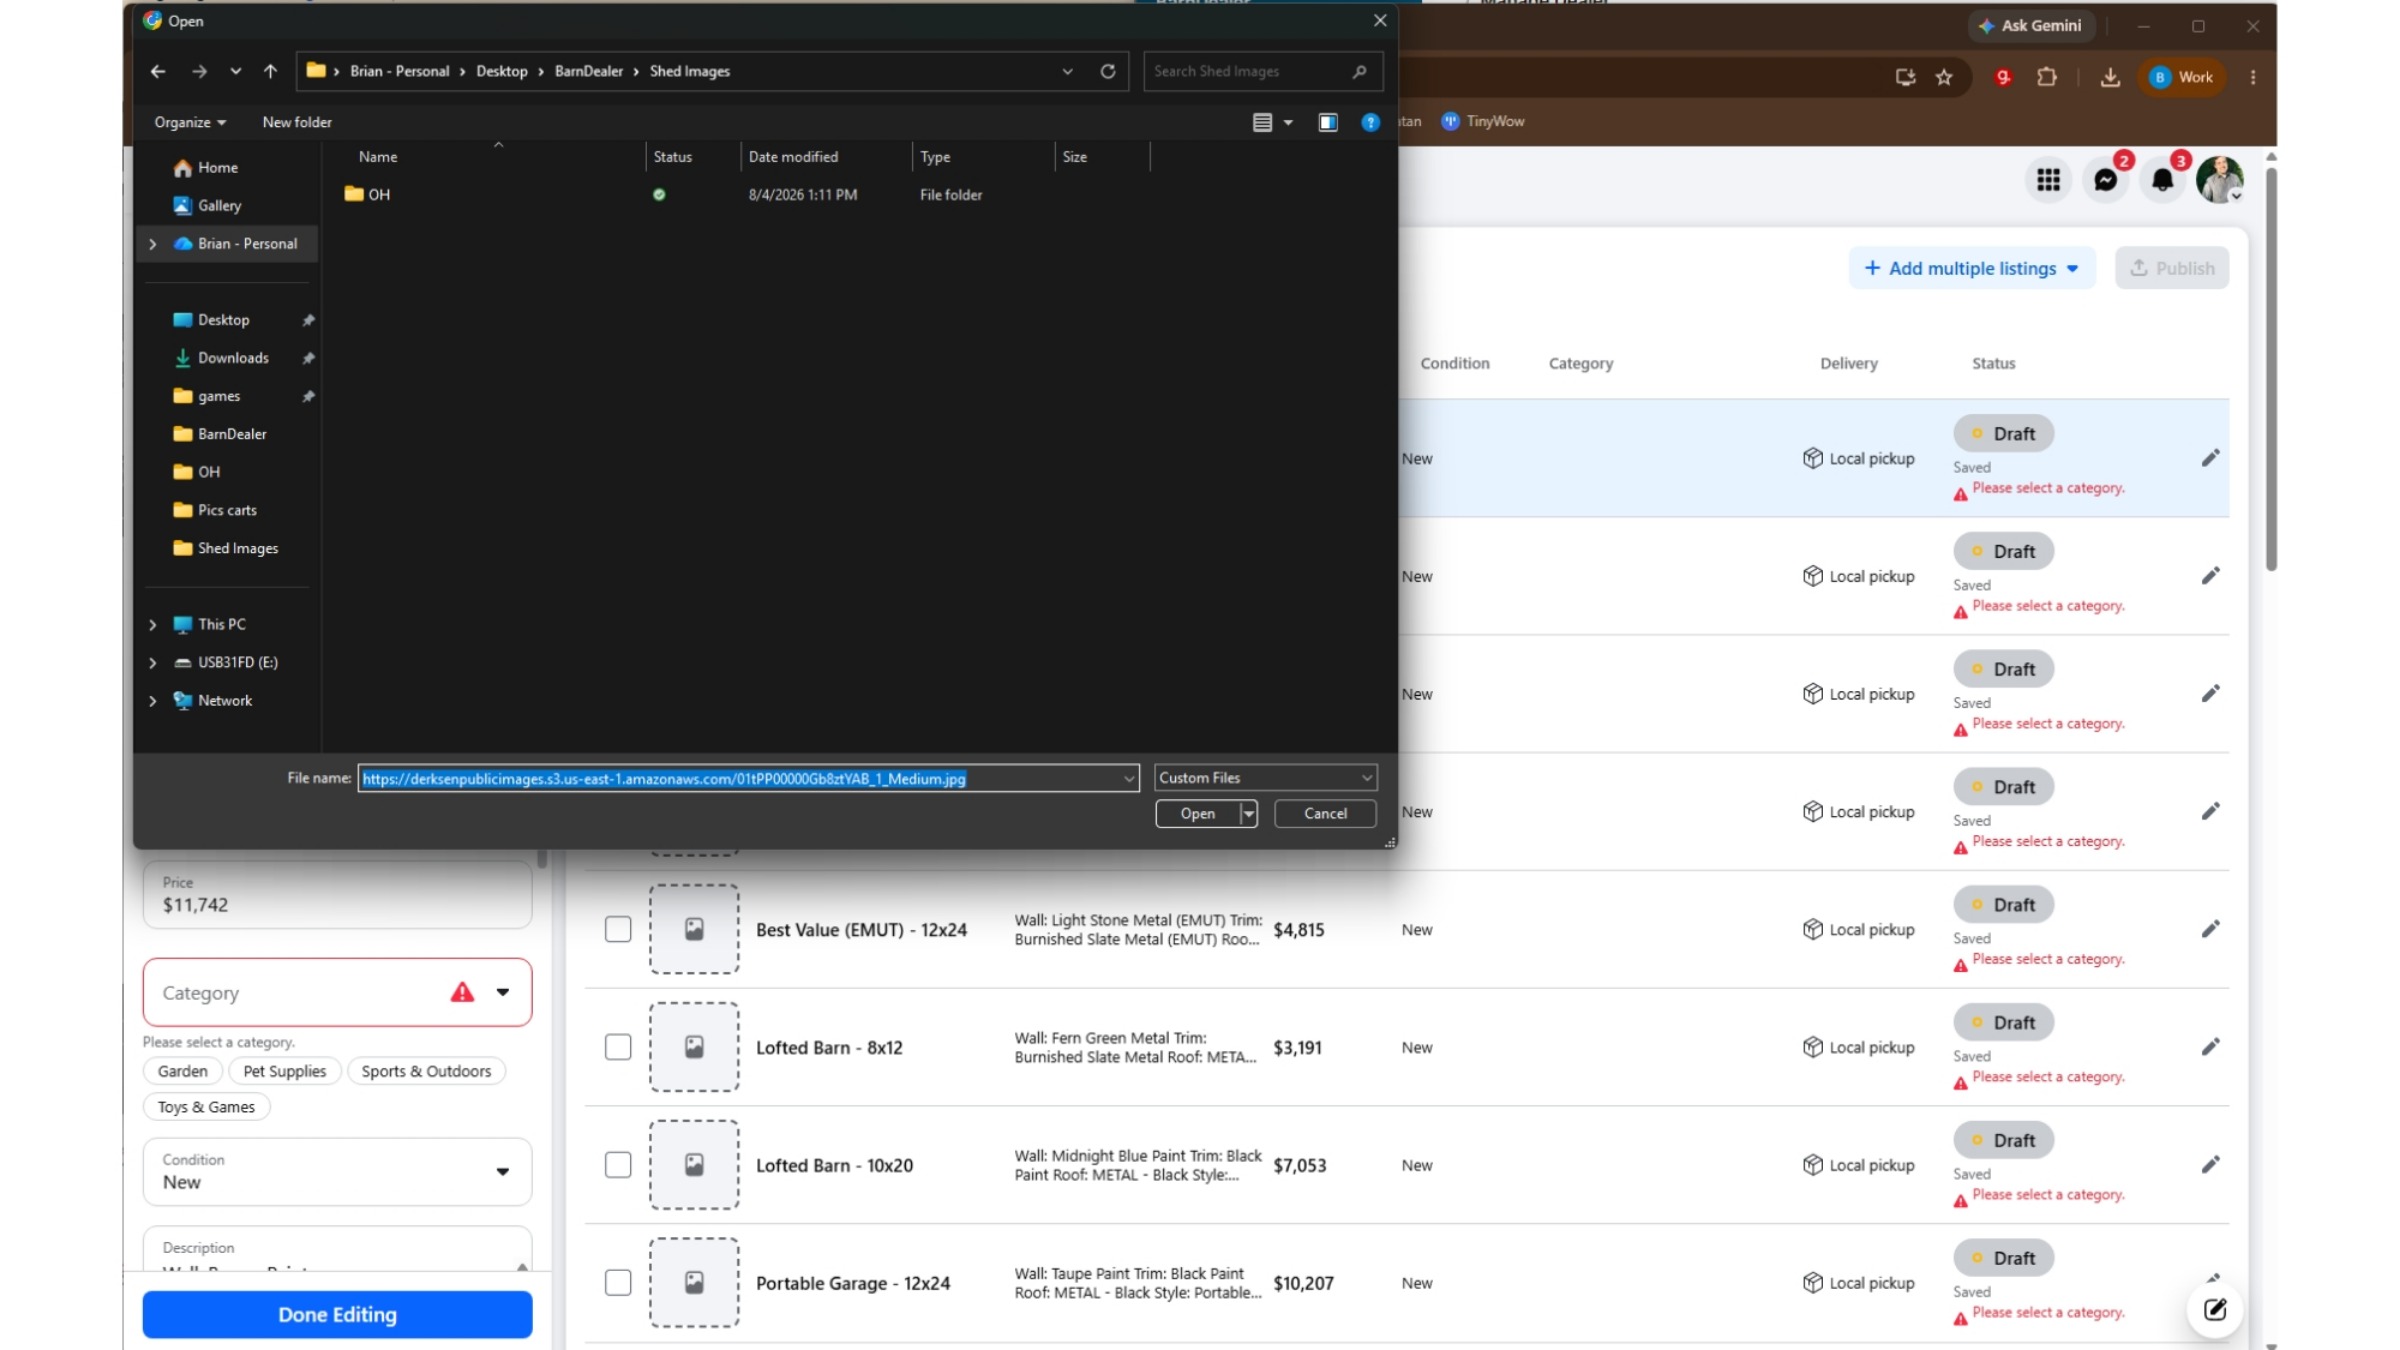
The CSV file contains the image file names, but Facebook's system does not automatically pull these images into your listings; this is a platform restriction, not a limitation of BarnDealer. To manually add images, first, open the CSV file in a program like Excel. Locate column F, which contains the string of image file URLs. Click into the cell, then carefully select and copy one image URL at a time, such as 'https://der...Medium.jpg'. Once copied, you will return to Facebook to paste this URL.
8. Pasting Image URLs into Facebook
Returning to your Facebook 'Create Multiple Listings' page, you will now click the 'Add Photos' button for the specific listing you are working on. This action will open a new dialog box. Instead of browsing for a file on your computer, you will paste the image URL that you just copied from your CSV file directly into the designated field within this dialog box.
9. Uploading Images via URL
When the 'Add Photos' dialog box opens, there's no need to navigate through your computer's folders. Simply paste the copied image URL into the field labeled 'file name.' After pasting the URL, press 'Enter' or click 'Open.' Facebook will then retrieve the image directly from the provided web path and upload it to your listing, streamlining the image addition process for each of your inventory items. Image Upload Confirmation and Category Selection After successfully pasting the image URL and confirming, the image will be pulled from its path and uploaded to your listing. With the image now in place, the final crucial step before this particular building is ready for publication is to select an appropriate category. This ensures your listing is properly classified within Facebook Marketplace, making it discoverable by potential buyers browsing relevant sections.
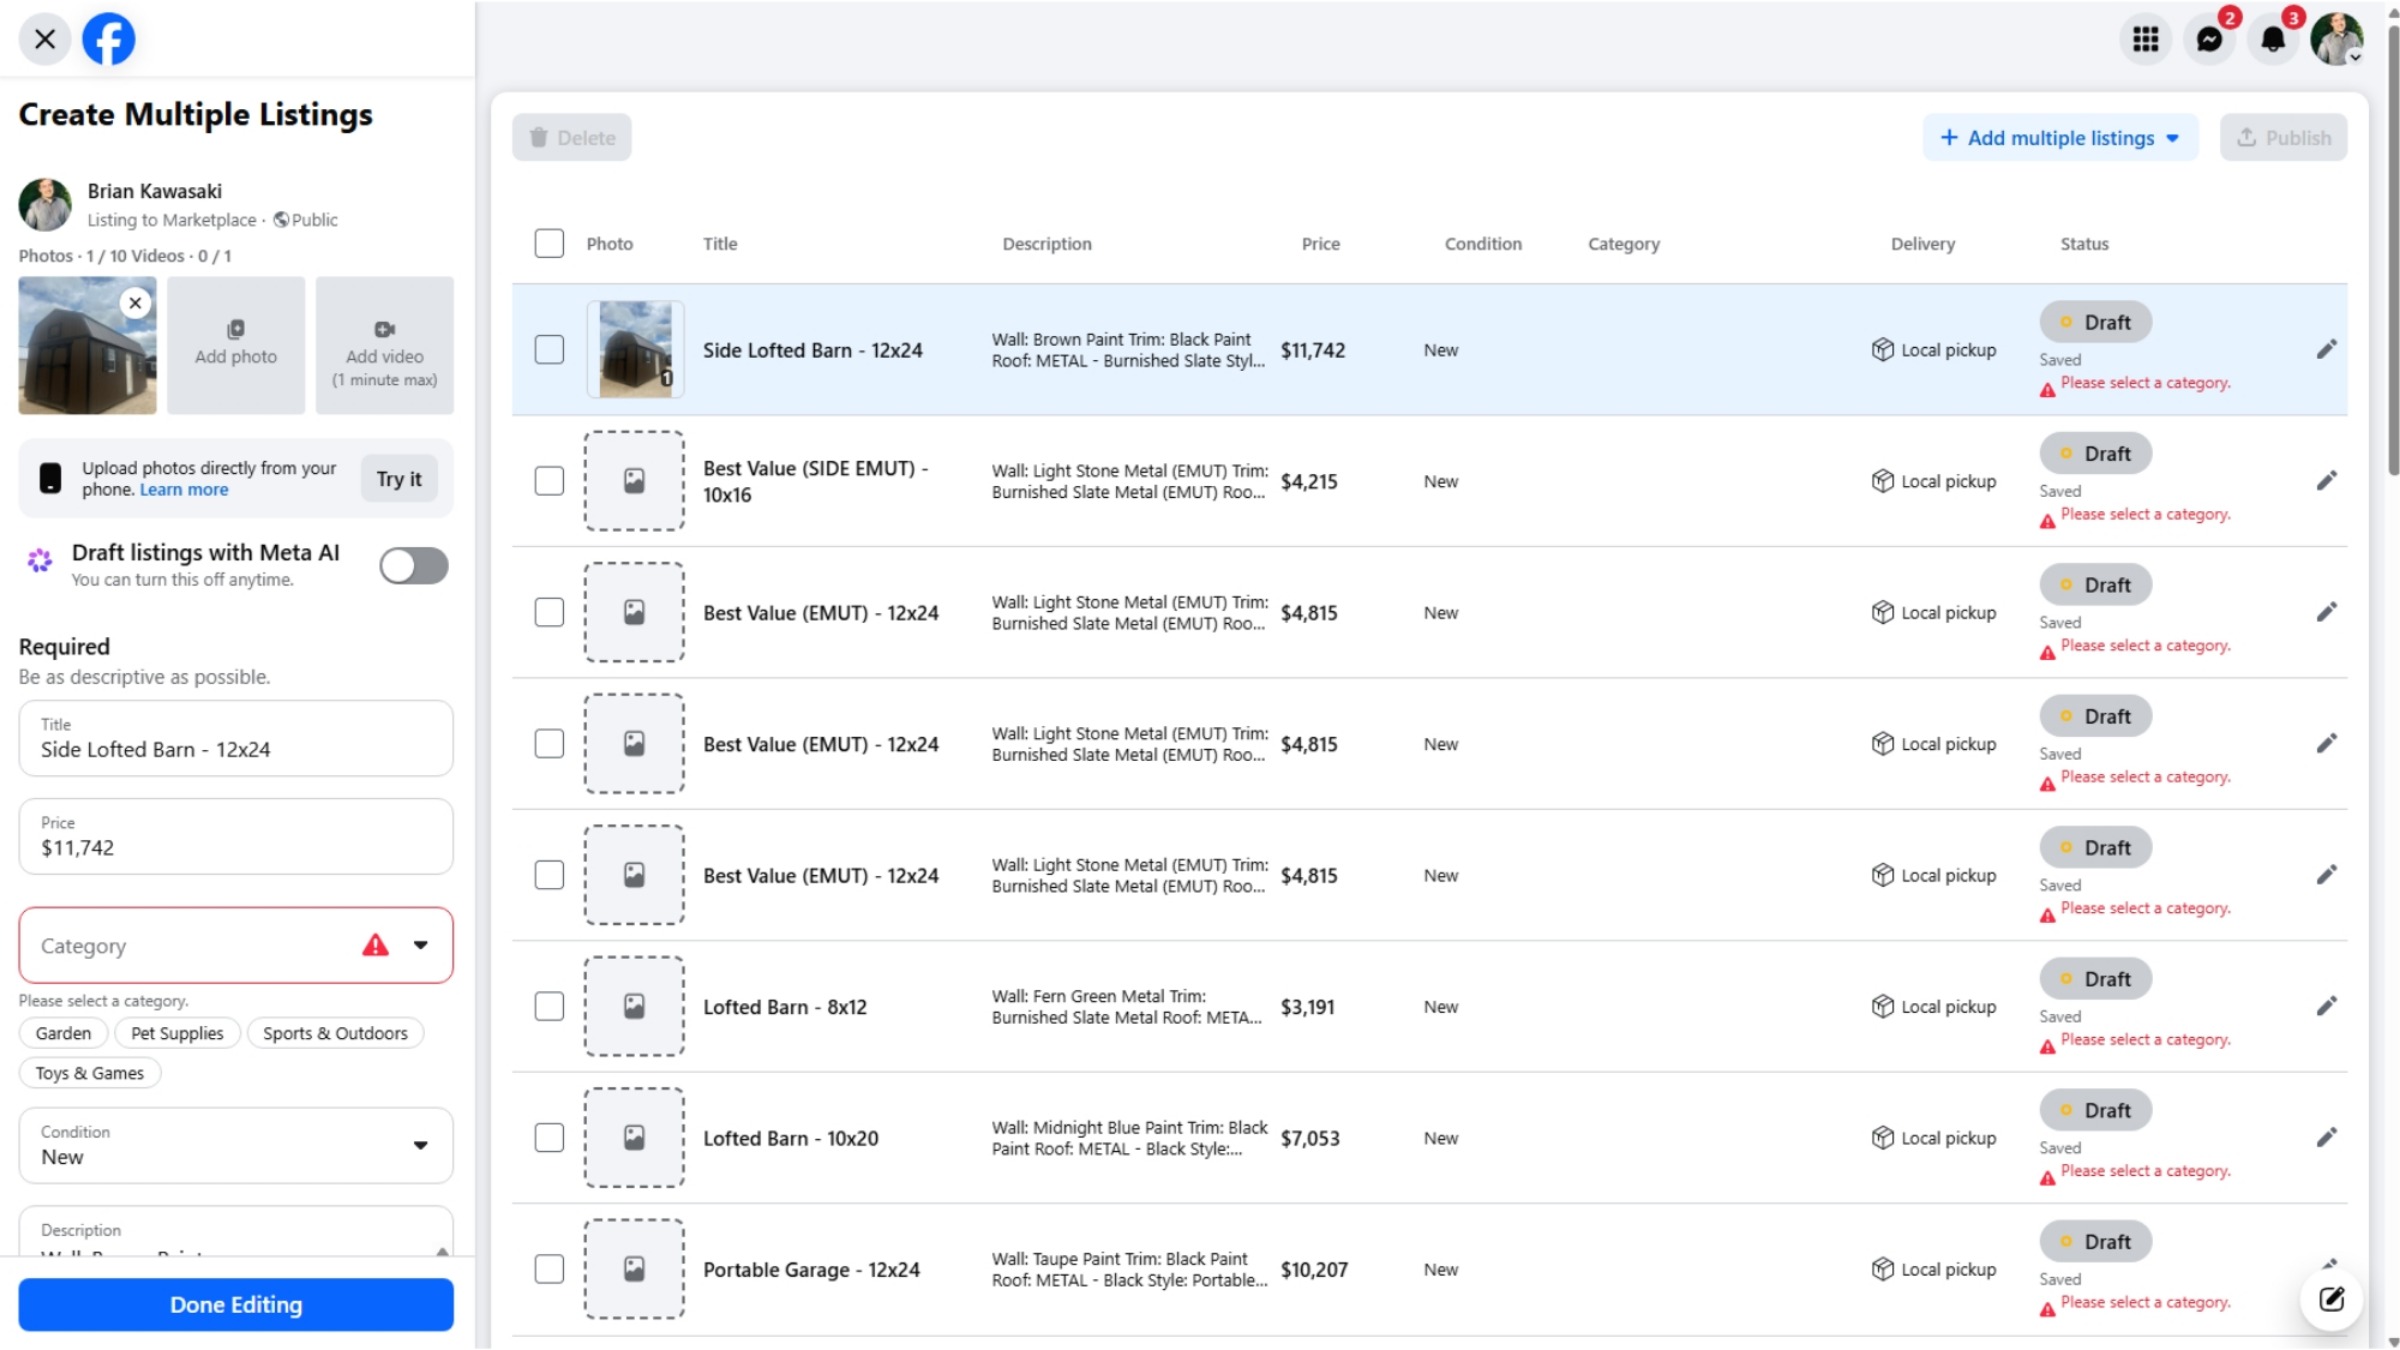
10. Image Upload Confirmation and Category Selection
Image Upload Confirmation and Category Selection After successfully pasting the image URL and confirming, the image will be pulled from its path and uploaded to your listing. With the image now in place, the final crucial step before this particular building is ready for publication is to select an appropriate category. This ensures your listing is properly classified within Facebook Marketplace, making it discoverable by potential buyers browsing relevant sections.
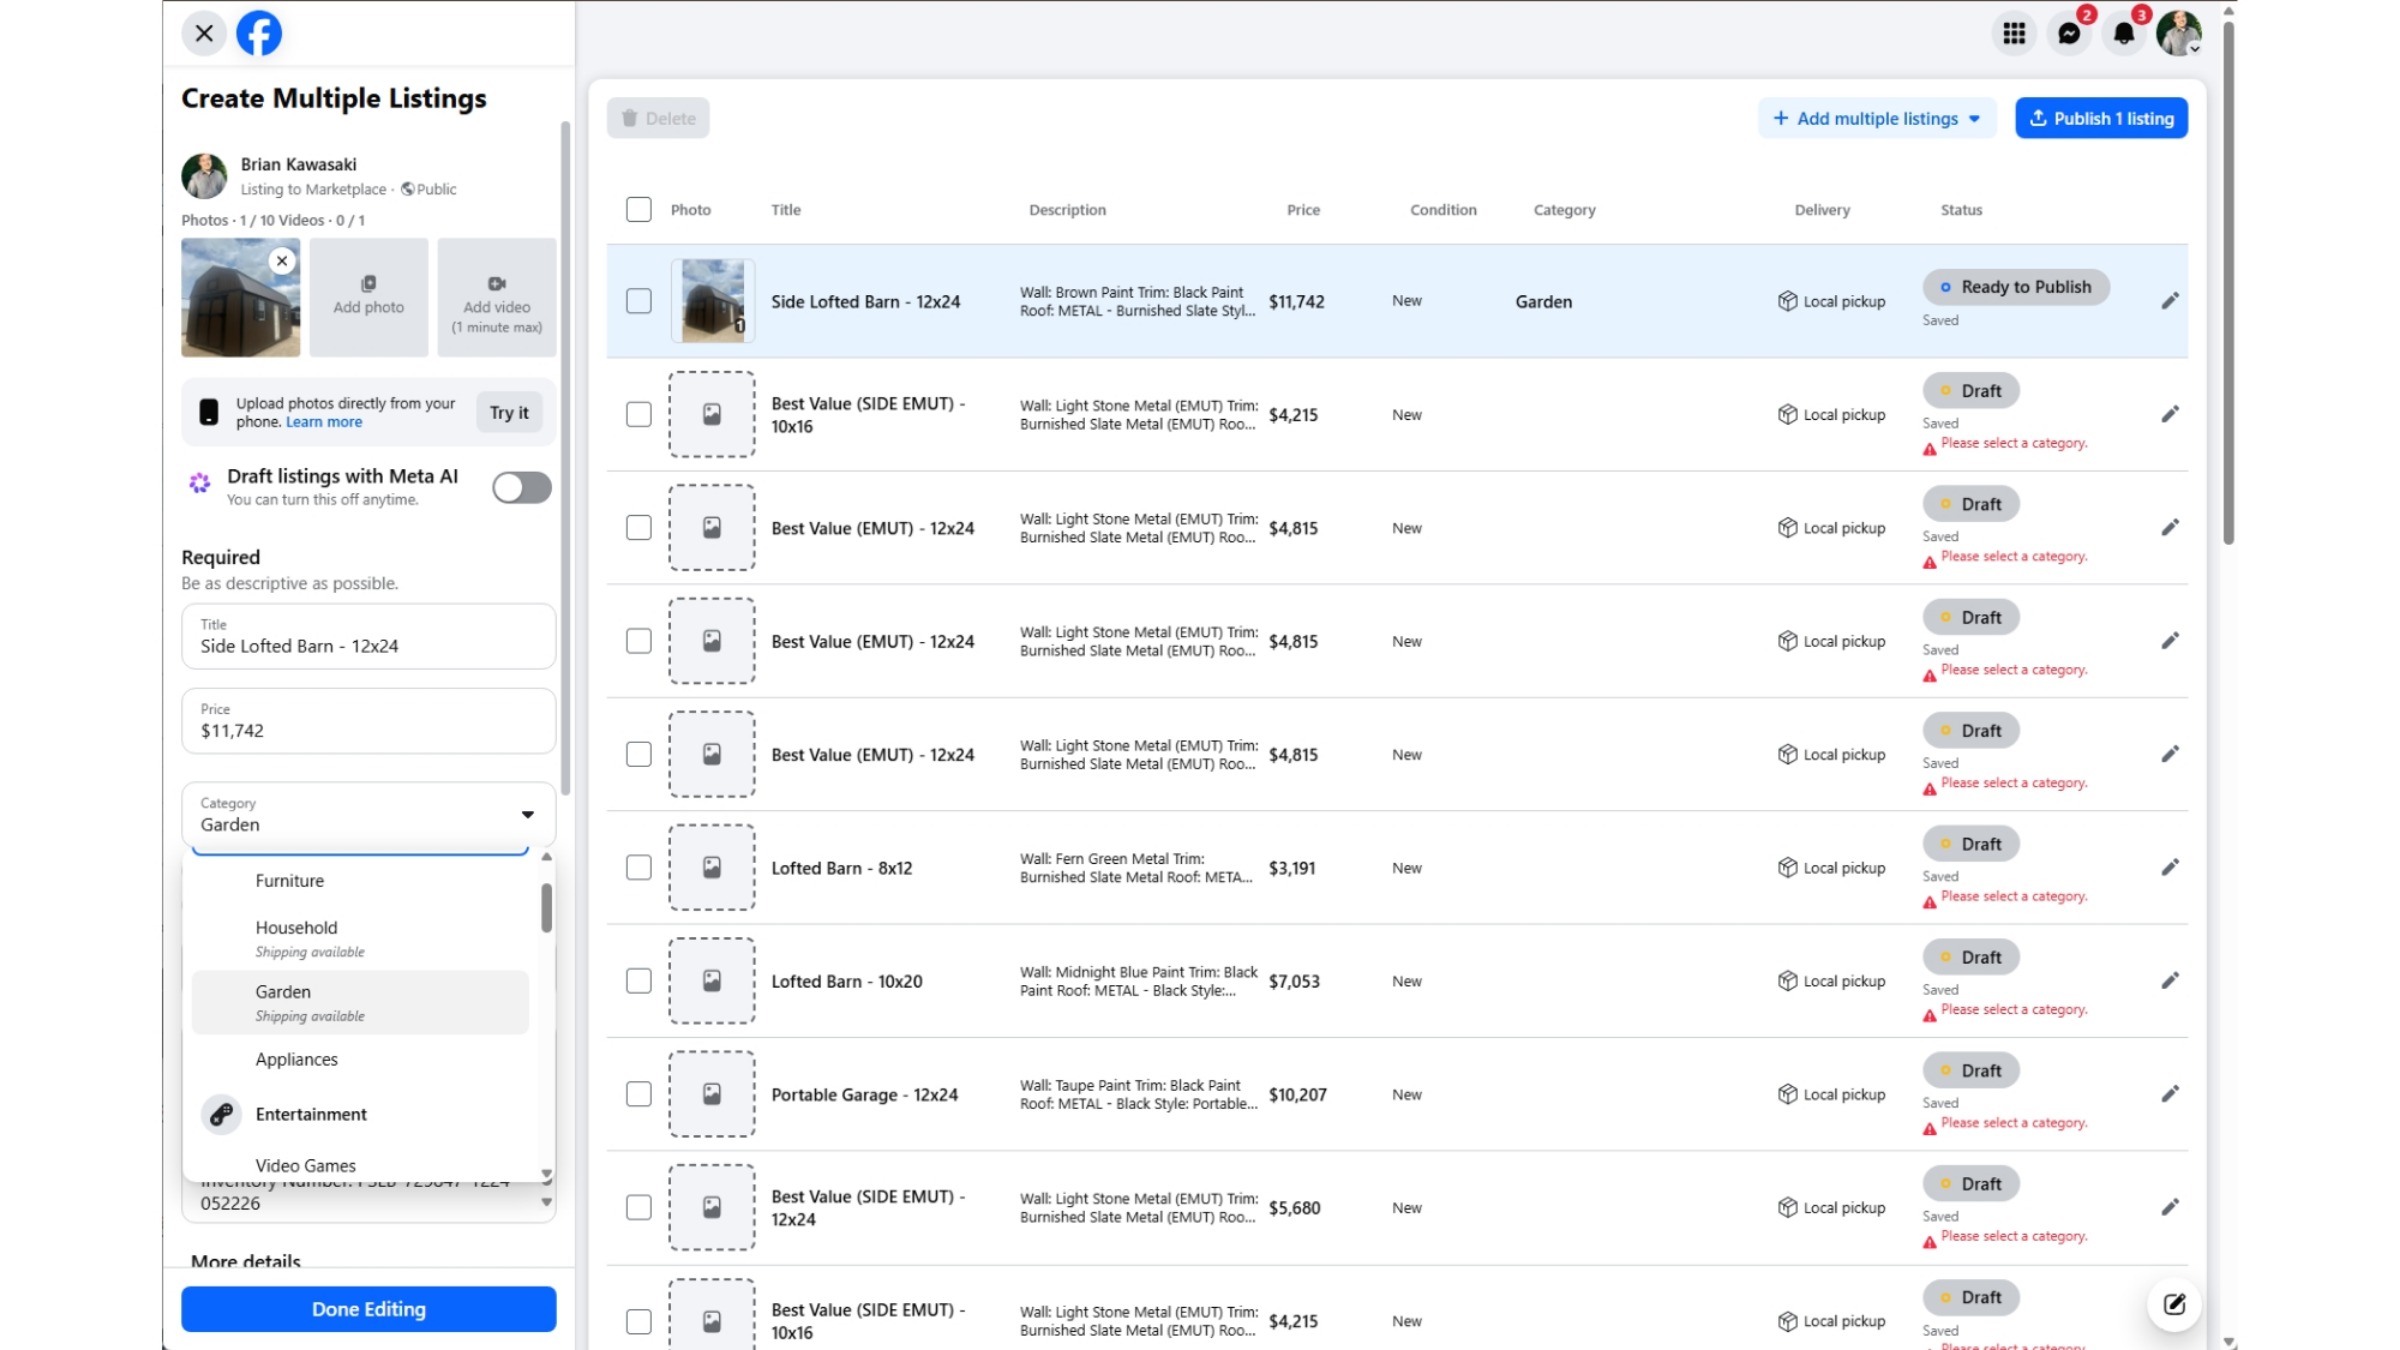
11. Choosing the Category
Facebook Marketplace categories are subject to change, so it's important to select the best fit at the time of listing. Currently, 'Garden' is often an excellent choice for sheds, or you might consider 'Household' as an alternative. While 'Classified and Miscellaneous' is an option, it typically results in less visibility compared to more specific categories. Once you have added a photo and assigned a suitable category for each of your posts, you are then ready to click the 'Publish listings' button in the top right corner. This action will publish all listings for which you have completed these two essential steps.
12. Optional: Boost Your listing and Visibility Settings
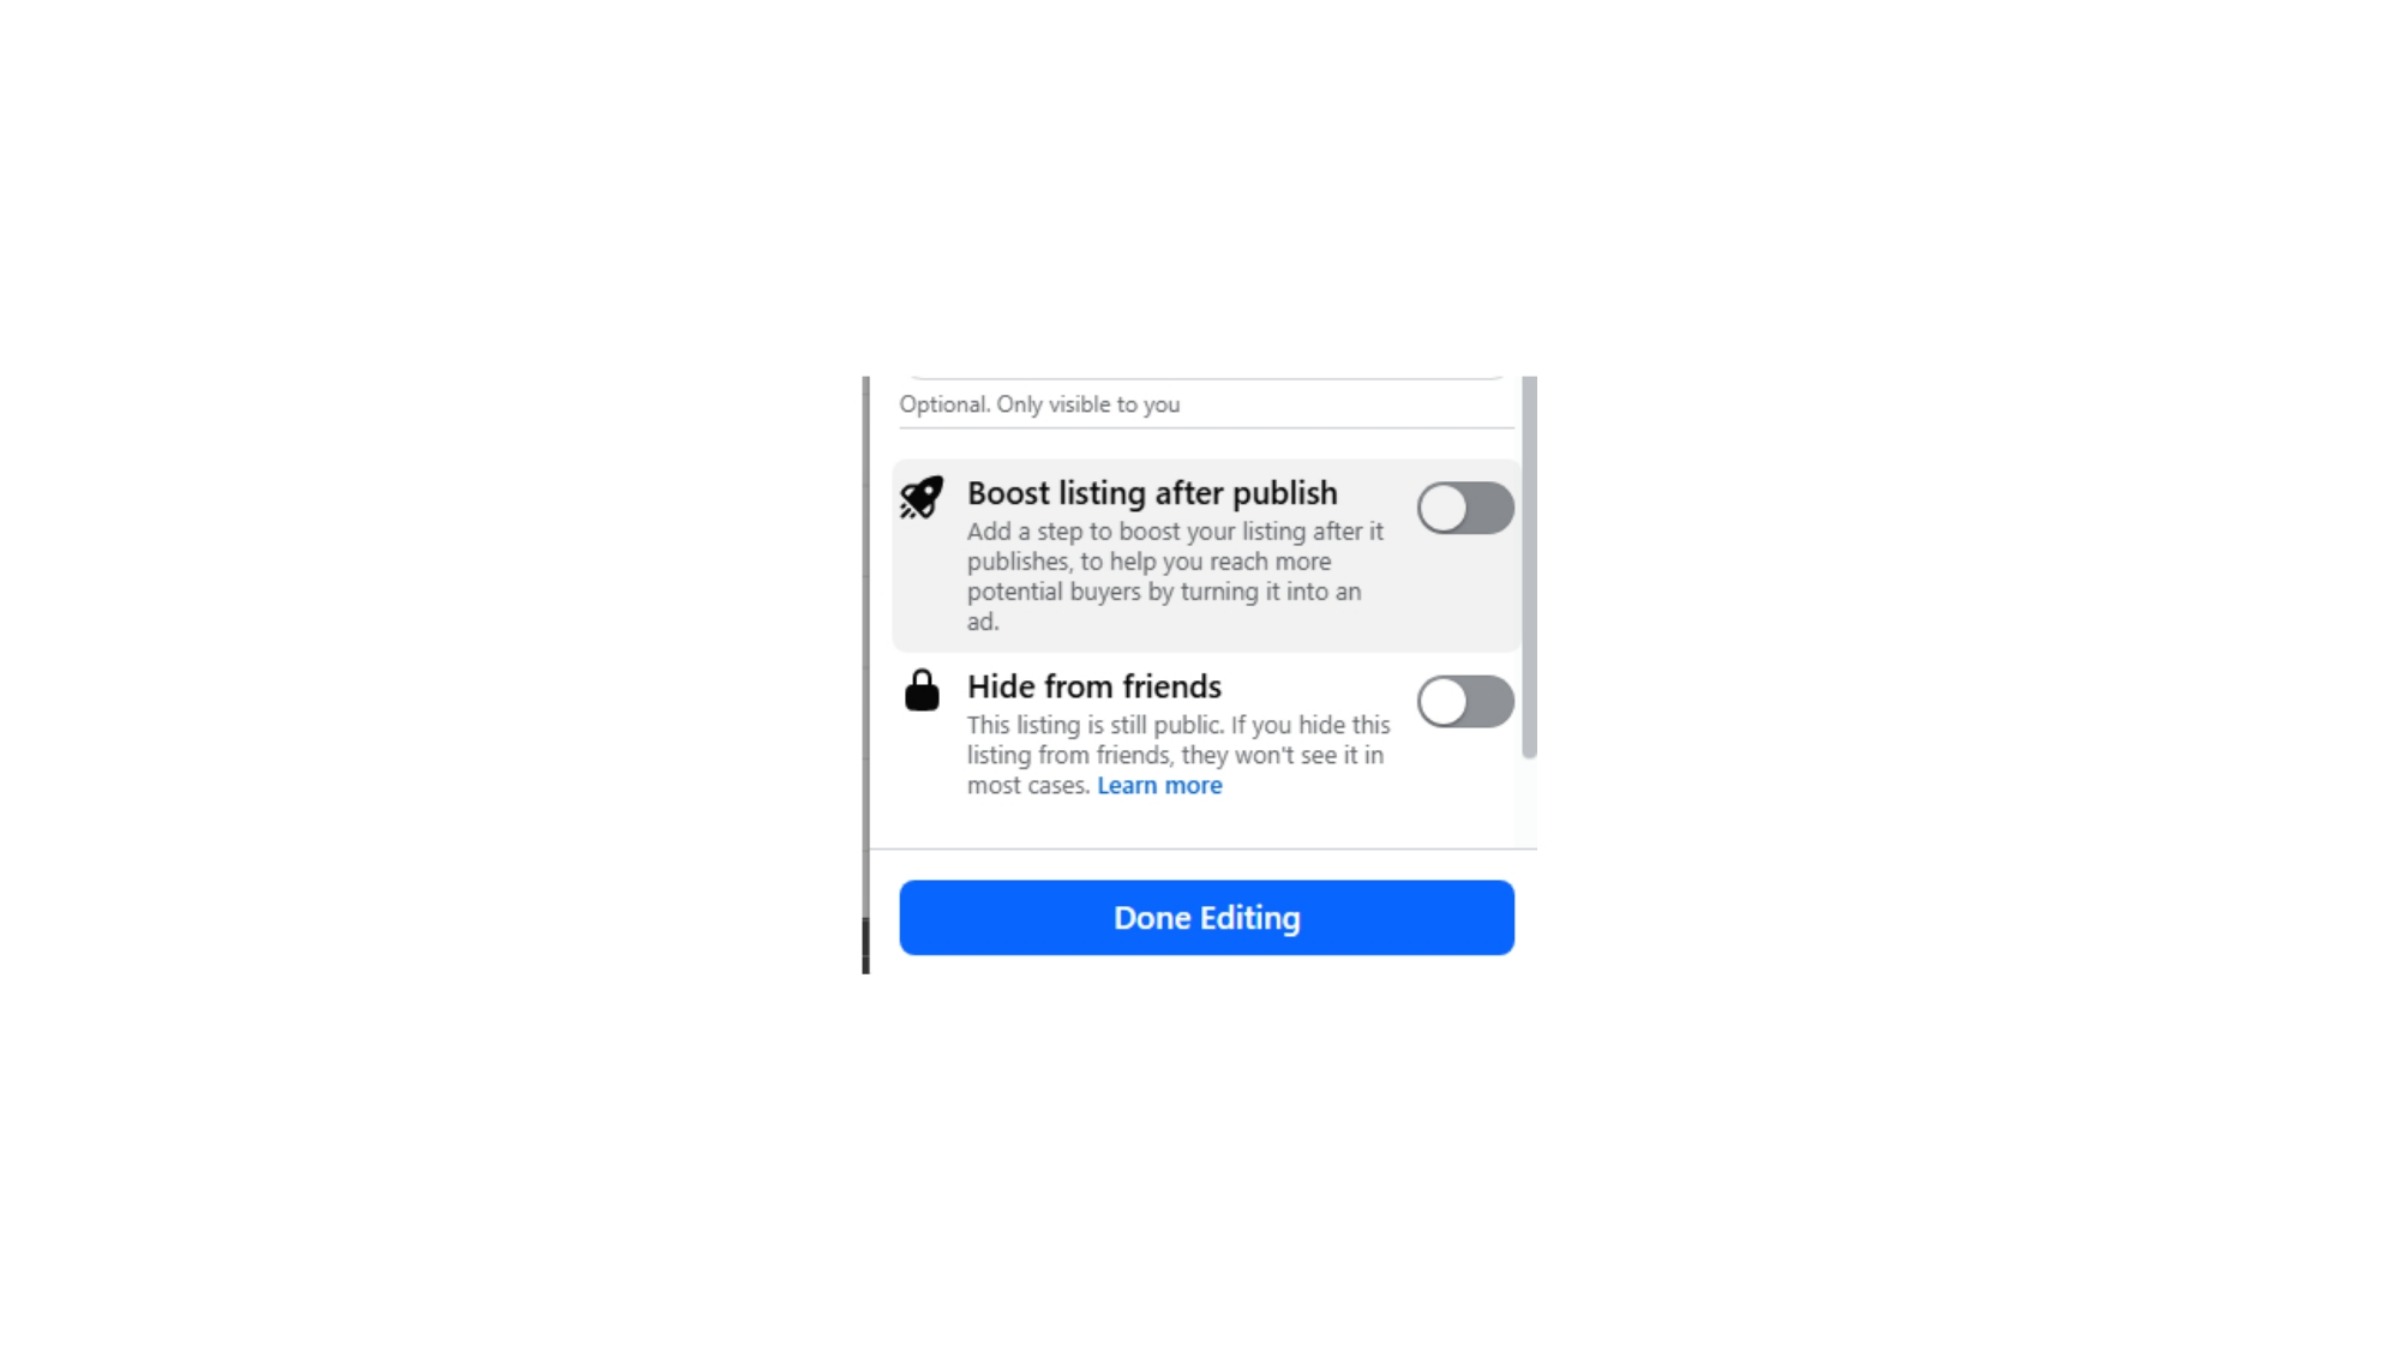
At the bottom of the post editor, you'll find an option to 'Boost listing after publish.' This feature allows you to allocate a budget to advertise your posting on Facebook. Boosting ensures your marketplace listing reaches a wider audience, significantly increasing its visibility to potential buyers. Furthermore, it provides valuable metrics on views and engagement. If you're looking to invest in advertising with a modest budget, boosting your listings is an effective strategy to maximize exposure and drive interest in your inventory. Beyond boosting, you also have control over your listing's visibility. The 'Hide from friends' option allows you to keep your listing public to the general marketplace audience while preventing it from appearing in the feeds of your personal Facebook friends. This provides flexibility in how your listings are presented across your network, ensuring your business posts reach the intended audience without necessarily being seen by your immediate social circle.
This guide covered the comprehensive process of exporting BarnDealer inventory to Facebook Marketplace, from downloading the CSV file and navigating Facebook to uploading listings, adding images via URL, selecting categories, and utilizing optional boosting features. By following these steps, users can efficiently manage and publish their shed inventory, enhancing visibility and sales opportunities. Thank you for taking the time to review this comprehensive guide. Should you have any further questions or require assistance, please do not hesitate to reach out to BarnDealer Support for personalized help.